Granting permissions on Windows 7: standard procedure
There are two procedures for provide Windows 7 permissions, one manual and one automatic. Let's start with the first one, which is a bit more complex to follow but helps to better understand how the Windows file protection system works.
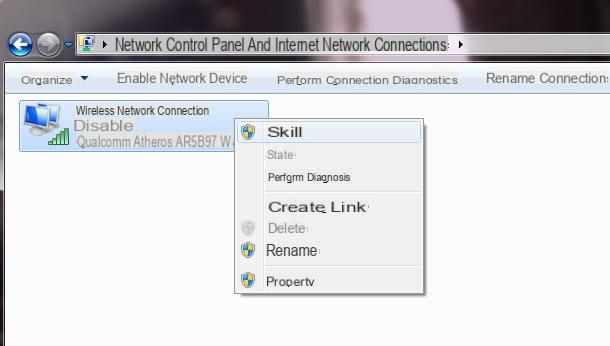
To become the "owner" of a certain file or folder, that is to acquire the permission to modify it freely, all you have to do is click with the right mouse button on it and select the item Property from the menu that appears. In the window that opens, select the tab Safety and click on the item first Users and then on the button Advanced.
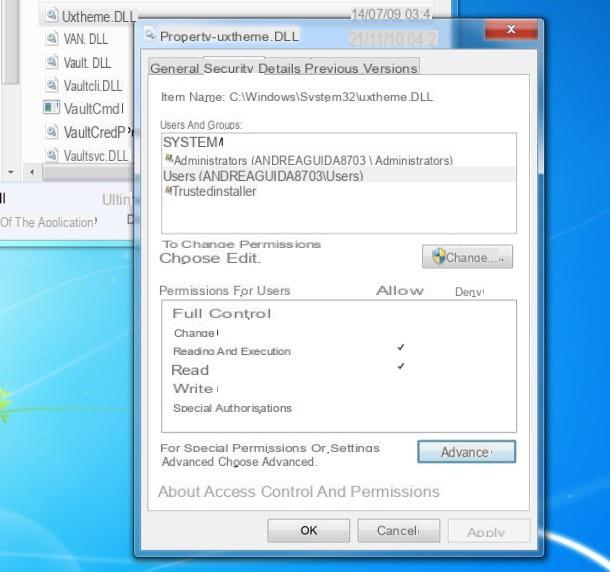
Now, go to the tab Owner and click the button Modification. Select your username from the list that appears and click on OK three consecutive times to save the changes made.
If you want to unlock changes for another user, select their name and not yours from the list Change owner to. If the name of the user you want to allow changes to the file is not listed, press the button Other users or groups and type it in the window that opens. The username must be complete with initial path (eg. PATHNAME 8703username). To help you fill in the field correctly, use the button Check names.

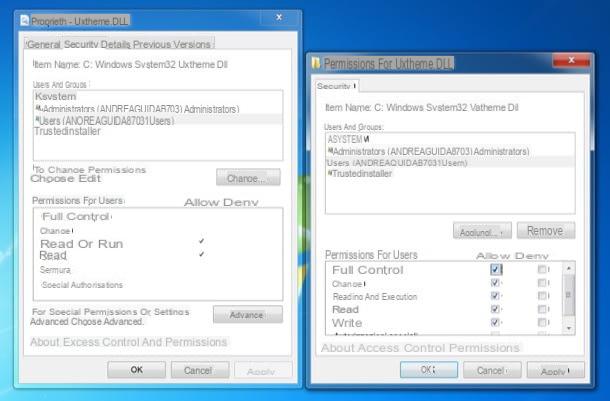
At this point, go back to the Property file, select the tab Safety, select your username from the list that appears and click on the button Modification. In the window that opens, select your username once again (eg. Users- [your username]), metti il segno di spunta accanto alla voce Complete control located in the column Allow and click on first OK and then Yes per salvare i Cambiomenti.
Done! You have now become the "owner" of the selected file and you can freely modify it by renaming it, moving it, deleting it, etc. When you try to modify the file, you will most likely be asked to confirm the operation by clicking on the button Continue.
I'll repeat it: follow the procedure I just explained to you only if you really know where you are putting your hands. Editing system files could seriously affect the stability of Windows.
Programs to provide permissions on Windows 7
Now that you have a better understanding of the file protection mechanism, we can see how to provide Windows 7 permissions in a simpler way, that is by adding an entry to become “owners” of the files in the context menu of the Windows Explorer (the one that opens by right clicking on an item).
Script Take Ownership
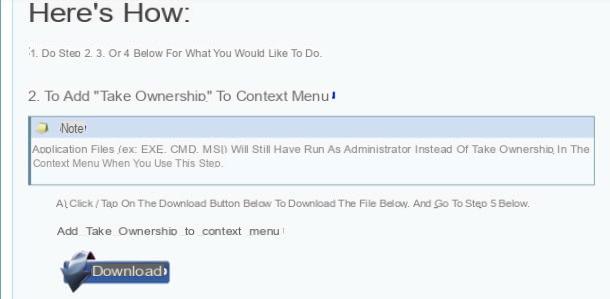
One of the simplest and most effective tools for managing file permissions on Windows 7 is the Take Ownership script. This is a registry script that adds the entry Take Ownership to the Windows context menu. This means that, after installing it, it is possible to acquire permission to modify a file (or folder) simply by right clicking on it and selecting the item Take Ownership give the menu check if you press.
Try us now! Connect to this page of the Windows 7 Forums website and click on the button Download found under the heading Add_Take_Ownership_to_context_menu to download a registry script that adds the file ownership entry to the Explorer context menu.
When the download is complete, double-click on it to open the archive you just downloaded (Take_Ownership.zip) and extract its contents to any folder. Now, double click on the file Add_Take_Ownership_to_context_menu.reg just extracted from the downloaded archive and first click on Yes twice in a row and then on OK but I will modify it.
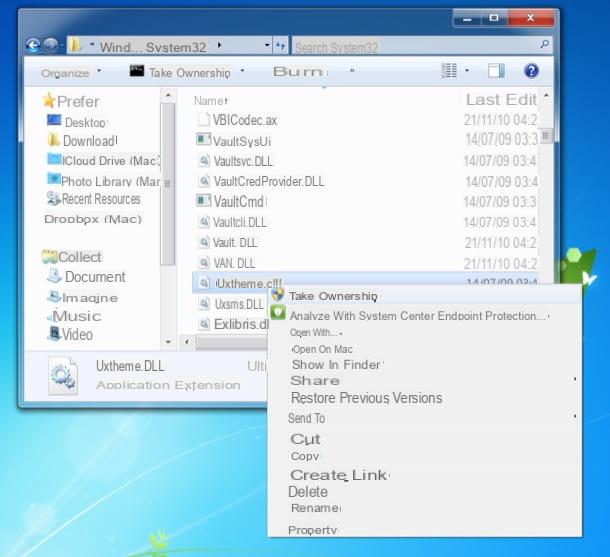
From this moment on, to acquire the permissions to modify the protected files of Windows 7, all you have to do is select them with the right mouse button and select the item Take Ownership give the menu check if you press.
If you have second thoughts, you can remove the option from the context menu of the Explorer by downloading the script Remove_Take_Ownership.reg from the Windows 7 Forums website and installing it on your system by double clicking.
TakeOwnershipPro
If you need to change permissions on multiple files or folders at the same time, try TakeOwnershipPro. It is a free application compatible with Windows 7 and later that allows you to unlock file changes with a simple drag and drop. Unfortunately it requires a short installation procedure to be used, it is not portable, but this is a minor problem compared to its convenience.
To download TakeOwnershipPro on your PC, connect to the program's website and click on the blue button Download. Then open the installation package TakeOwnershipPro.exe that you just downloaded on your PC and first click on Yes and then Next for four consecutive times, install e Finish to conclude the setup.
You are now ready to take action. Then start TakeOwnershipPro clicking on its icon in the menu Home Windows, drag the files and folders to be "unlocked" in its main window and click on the button Take ownership but I will complete the procedure.
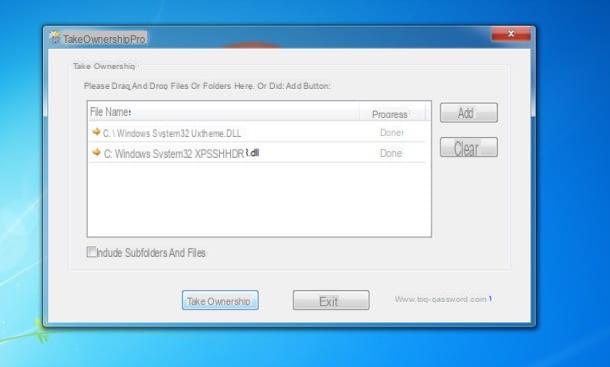
If you are unblocking permissions related to folders, put the check mark next to the item Include subfolders and files you can make sure that the change of permissions is also applied to the files and subfolders contained in the latter.
I renew my recommendation to use these tools with extreme caution. I take no responsibility for any problems resulting from changing system files on your PC. Then don't tell me I didn't warn you!
How to give Windows 7 permissions