Preliminary operation
Before seeing, in detail, how to scan with Windows 7, there are some preliminary steps you need to take. In particular, I am referring to the collegamento scanner (or multifunction printer) to the computer and the procedure for configuring and installing the related ones driver.
Provide, therefore, to connect the scanner to the electric socket using the power cord supplied, then press the power button placed on the appliance (usually located on the front), in order to put it into operation.
Once this is done, you need to install the scanner drivers on your PC: in most cases, the required software is included in the device package in the form of CD o DVD. Alternatively, you can get them by visiting the support and assistance section of the manufacturer's website. If you feel you need a hand to get the job done, you can check out my specific guides on how to download HP drivers, Samsung drivers, Epson drivers and Canon drivers. Other information that may be convenient for you can be found in my review on programs for missing drivers. In any case, be sure to get Windows 7 compatible drivers.
Once you have inserted the driver disk into your computer's CD / DVD drive or have opened the relevant files downloaded from the Internet, start the installation process and follow the on-screen instructions. Usually, just always click on Forward / Next in the window displayed on the desktop.
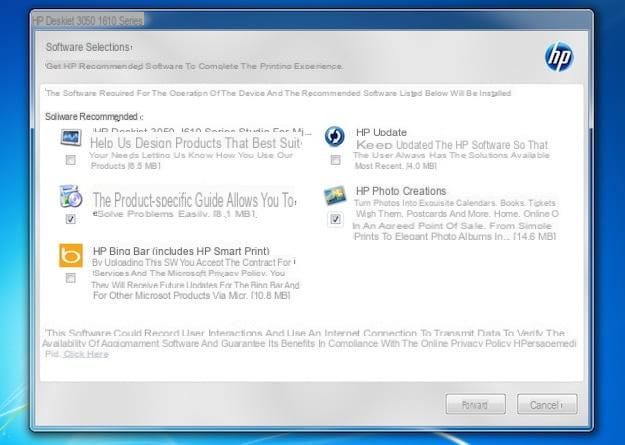
If, during construction, you are asked to install additional software, put the check mark only next to the applications for managing the scanner / printer and avoid browser toolbars or other promotional programs that may be present in the installation package.
Unfortunately, I can't be more precise on what to do, as the procedure to follow varies from device to device. In any case, in principle, the steps to be taken are the ones I have just indicated.
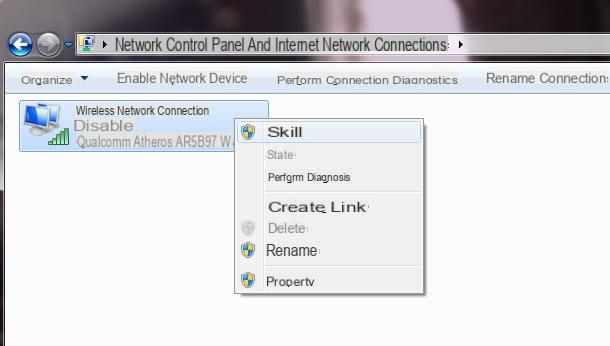
In the event that, by putting into practice the instructions above, Windows 7 does not recognize the scanner, you can "force" the thing by intervening on the system settings. To do this, click on Start button (I cheer with the windows flag) placed on the taskbar and click on the link Control Panel that you find on the right side of the Start menu.
In the window that opens, then click on the link View devices and printers or on that Devices and printers (depending on the type of display set), click on the item Add device which is at the top and waits for the PC to detect your scanner. Then, follow the guided procedure that is proposed to you.
If what you are trying to connect to your computer is a multifunction printer, instead of clicking on the button Add device select that Add printer, specifies whether it is a printer local or of network, wireless o Bluetooth and follow the on-screen instructions to complete the setup. If you think you need more help during the setup process, you can refer to my tutorials on how to connect a printer and how to set up Wi-Fi printer.
Scan with Windows 7
Once you have computed the preliminary steps necessary to be able to connect the scanner to the PC, you are finally ready to take the real action and go, therefore, to find out how to scan with Windows 7. To do this, you can use Fax and scanner, the tool included "standard" in Windows, through which it is possible to scan documents in digital format and save them in various image formats.
It should be noted, however, that this tool does not support OCR (Optical Character Recognition) technology and, therefore, does not allow to obtain PDFs with selectable / editable text. Having made this necessary premise, let's take action.
To use it, click on Start button (I cheer with the windows flag) located at the bottom left of the taskbar, type "Windows Fax and Scan" in the search field and select the relevant result.
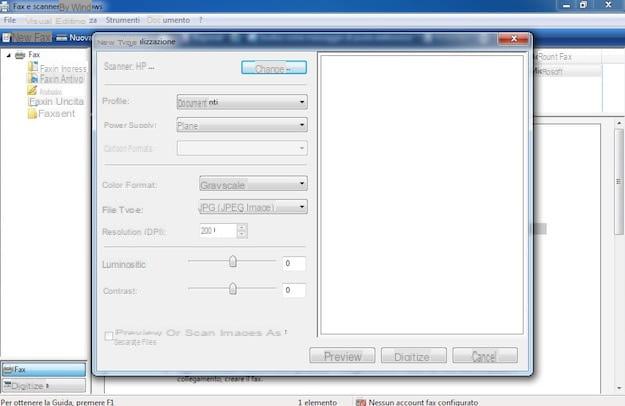
In the window that at this point is shown on the desktop, click on the button New digitization (located at the top left) and select the item Documents or that Gallery give menu to tendin Profile, depending on whether you want to scan a document or a photograph.
Through the drop-down menu Color format, then select the color range with which you want to scan the image (Greyscale, Color o Bianco e nero), then choose the file format in which you want to save the scan (via the menu File type) and indicates the resolution of the latter, in the field Resolution (DPI).
At this point, place the photo or document to be scanned under the lid of the scanner, click on the button Preview to preview the latter and, if you are satisfied with the result displayed on the screen, press the button Digitize to start the actual scan.
The duration of the procedure will depend on the resolution you have chosen for the image: the higher the number of DPI selected from the relative menu, the longer it will take the scanner to create the image. Note that scanned photos and documents are saved in the folder Documents> Scanned documents of the PC.
Programs for scanning with Windows 7
Did the scan tool included with Windows not satisfy you? If so, contact one of the third party programs that you find listed below: you will see that you will surely be able to find something suitable for you.
NAPS2
The first program to scan with Windows 7 that I want to invite you to try is NAPS2: it is a free tool for digitizing documents and photographs. It is very light, no-install and easy to use. Scans made can be saved in PDF, TIFF, JPEG, PNG and other file formats. Plus there is support for technology OCR (Optical Character Recognition) which recognizes the writing characters in scanned documents allowing to obtain PDFs with selectable / editable text.
To download the program on your PC, connected to the official website of the program, click on the button first More files and then on the link zip that you find next to the item Portable archive, at the section Latest relase.
When the download is complete, open theZIP archive obtained, extract its contents to a folder of your choice and launch the .exe file present inside. In the program window that is shown to you on the screen, if you want to use OCR technology, click on the button OCR located at the top left, put the check mark in correspondence with the languages say you are interested in your bottone award Download to download the relevant dictionaries.
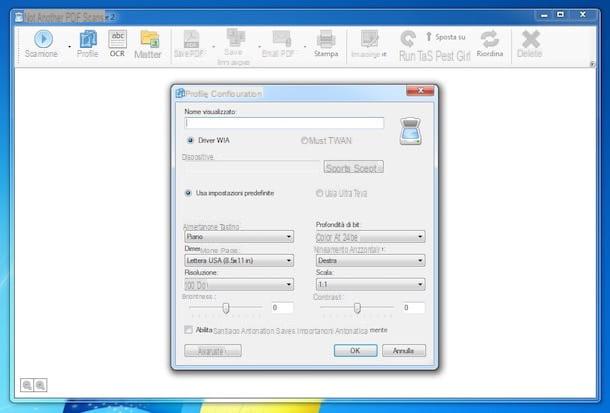
Next, scan your document by placing it under the scanner lid and clicking the button Scan located at the top left. Then set your preferences for paper size, color depth, etc., select the scanner to use and click on the button OK to start the scanning procedure.
To use the OCR technology on existing documents (and thus extract the text), click on the button Import of NAPS2, select the file of your interest and start the character recognition by clicking on the button OCR, located at the top left.
FreeOCR

Speaking of useful third-party software for scanning with Windows 7, it's practically impossible not to mention FreeOCR: this is another software for digitizing documents which, as the name implies, includes OCR technology (although it allows the export of text only as plain text). It is free, easy to use and fulfills its purpose perfectly. The scans performed can then be saved in both PDF and JPG format.
To download it to your PC, connect to the program website and click on the link first Download (placed at the top) and then on the button Download here, located at the bottom.
When the download is complete, open the .exe file ottenuto e, nella finestra che compare sul desktop, clic sui pulsanti Yes e Next. Then select the item I accept the agreement and click on the button again Next twice, on that one install and, finally, about that Finish.
Now that the software window is displayed on the screen, place the document to be scanned under the scanner lid, click on the button Scan, select your scanner by clicking on the button Select Scan Device, adjust the settings relating to color, paper and page size (via the other drop-down menus available) and click on the button Scan to start the scanning procedure.
Then, choose the language of the document from the drop-down menu OCR Language, delete all the text in the right box (the one starting with FreeOCR Notes) and the first button OCR to start the text extraction, specifying in advance whether to perform this operation only on the page displayed in the preview (Current page) or on all pages of the document (All Pages).
After a few moments, you should see the contents of the PDF appear on the right side of the program, in the form of plain text. To copy and paste it where you think it is more appropriate, all you have to do is select the portion of text of your interest and choose the item Copy from the menu visible after right clicking. If you want to copy all the text shown, click the button with i two sheets located in the bar located in the central part of the program window.
If, on the other hand, you want to save the scan as a JPG image, simply click on the button Save JPG which is located at the top of the FreeOCR window and indicates the location on your computer where you want to save the final file.
WinScan2PDF
Another software that I want to invite you to consider is WinScan2PDF: it is a free, easy-to-use and no-install software that allows you to scan documents by transforming them into PDF files, even multi-page ones.
To download it on your PC, connect to the program's website and click on the link WinScan2PDF_Portable.zip placed at the top. Once the download is complete, open the ZIP file obtained, extract its contents to a folder of your choice and launch the .exe file present inside.
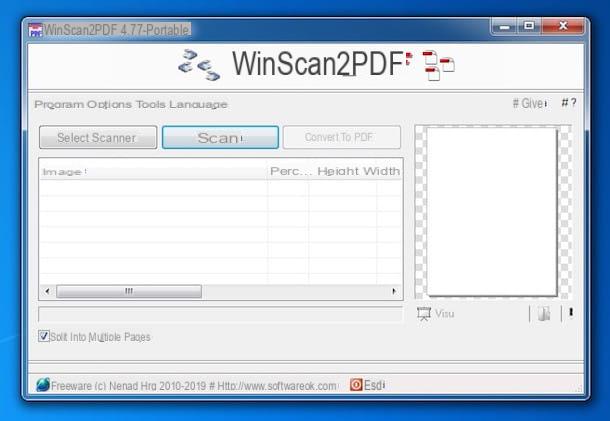
In the window that opens on the desktop, put the check mark next to the item Split into multiple pages (if you want to create multi-page PDFs from your scans), click the button Select scanner to select the scanner to use, place the document to be scanned under the scanner lid and start scanning by clicking on the button Scan.
Once all pages have been scanned, click the button Convert to PDF and save the final PDF in a PC location of your choice. It was simple, wasn't it?
Other programs for scanning with Windows 7
To have more control over scanner settings before scanning a document, you can use theofficial application which is almost always installed along with the device driver.
To find it, click on Start button (I cheer with the windows flag) placed on the taskbar, select the voice All programs in Start menu which opened, then the folder with the name of the manufacturer of the scanner and click on name of the utility device management (eg. HP Scan).
In the window that opens, you will find all the options to adjust in detail the properties of the scanner, the quality of the images to be obtained (resolution, color, etc.) and the target format of the files. Additionally, there are often features to automatically email scanned documents, create PDF documents, and more.
Please note that if the scanner management utility is not automatically installed when configuring the device, you can find it yourself from the manufacturer's website.
For example, in the case of Epson just visit the Software and Apps section of the company's website, while regarding HP you just need to search for the model of the reference device from the section of the manufacturer's website dedicated to online assistance and download the relevant programs to use the scanner on your PC from there. Simple, right?
How to scan with Windows 7