From ActivationTrouble we want to offer you all the information you need to activate your Google account, so you can manage your Gmail user . If you want to know the process to follow, don't miss our post!
How to activate a new Google account
Do you want to activate a new Google Account? In other words, you want to know how to create a new Google account , however, you don't know what you need and what steps to follow?
Do not worry, as I anticipated, it is an extremely simple operation.
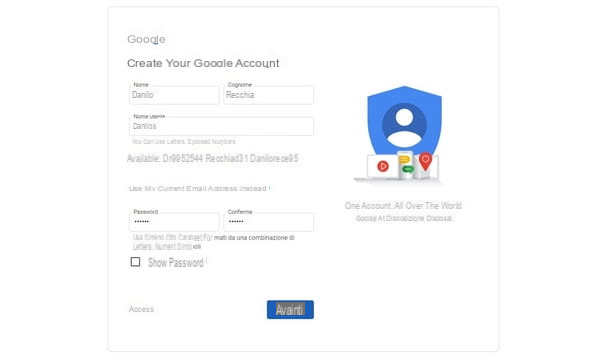
All you need is a web browser. Proceed to open your favorite browser program (you can precede it both from the PC and from the smartphone and tablet), whatever it is, continue by connecting to the Google home page. Once on the Google home screen log in to your Gmail account, but what you need to do is create a new one and then press the Create Account button below, then click on the For Me option (the alternative is To run my business for workplace use). By doing so, you will be taken to the account creation screen with the appropriate registration form to complete.
The information required for activation of a new account is First Name and Last Name, Username, i.e. a name of your choice that you wish to associate with the @gmail.com email address (letters, numbers and periods can be used), Password, then enter the confirm password by repeating the same entered and conclude by typing your Date of Birth.
After entering all the required data, click on the forward button, proceed by entering a recovery email address and a mobile number (I recommend you also enter this information, because it is useful in case you forget or lose the access data) and provide the information date of birth and gender of belonging.
Before concluding the account creation, read Google's terms of service and select the Checkbox at the bottom of the page to accept these terms. Once you have done this, click on the Create Account button to complete the procedure.
Please note that it is possible to customize your choices about what information will be shared with Google, for example, with respect to personalized ads, search and YouTube history, location history, and voice and audio activity. To adjust all these and other customizations, press the Other options button.
How to activate your Google Account on PC
Now that you have created your new Google account, you will surely be pleased to know that it is possible to have your Gmail account on your PC with an operating system. I will tell you about the specific procedures in the next two chapters.
How to activate Google account on Windows 10
The procedure I am about to describe is intended for PCs with a Windows 10 operating system. In fact, it is one of the most interesting innovations that Microsoft has introduced in this version of its operating system.
Continuing with Google Account Pairing with a Windows 10 device, you will be able to control applications and programs with the data entered in your Google account, including e-mail, contacts and Calendar tools.
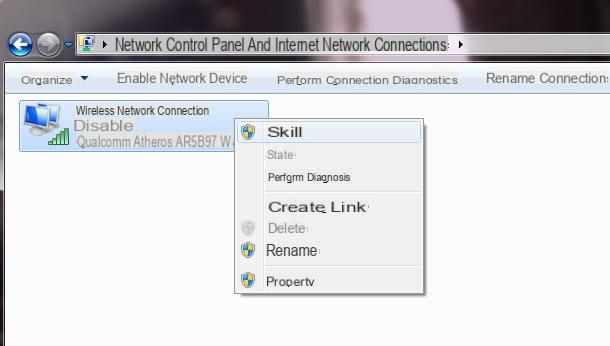
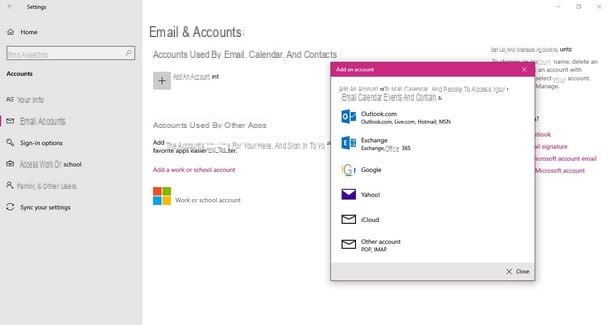
To associate the Google account in Windows, press the Start key placed on the taskbar in the lower left corner (the icon is a flag with the logo of the operating system). From here, click on the Settings button (whose icon is a gear) and then select the Account item from the window that opens.
Next, click on the Email and Accounts item in the sidebar on the left, then click on the Add Account button and choose Google from the menu that is proposed to you. The login window for the Gmail account will be displayed on the screen.
Complete the procedure by entering your respective email address orphone number in the respective fields, then enter the password and press the forward button to authorize Windows 10 to use your Google profile information (if you have enabled 2FA, you will also need to enter a disposable verification code). To do this last operation, click the allow button and then that Done located at the bottom right.
Clearly, it is possible to change the settings just entered also at a later time, as well as intervene on the synchronization options or delete them directly. All this is possible from the menu relative to the Google Email Address you added, accessible by following the path Settings> Accounts> Email and accounts. You can view the available options by pressing the manage key.
How to activate the Google account on Mac
It is possible to associate the Google account with a Mac, in a very similar way to what has already been seen for systems running Windows 10. This allows you to synchronize the "big G" account with Mail, Contact, Calendar and Note: of MacOS.
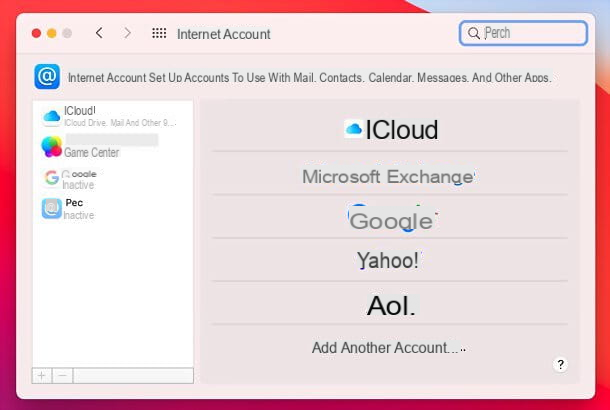
To do this, go to the System Preferences menu from the gear icon present in Dock Bar. From the new window, then click on the Internet Account icon and choose the Google voice. You may need to click on the [+] button at the bottom left in case you do not see the Google entry directly.
If you are prompted to log in, click the Open your browser button to authenticate from a new window and enter the email address (orphone number ) linked to your Google account, then click the go ahead button and log in with your Google account password (if you have enabled 2FA, you will also need to enter an OTP code).
The procedure is almost complete, just click the allow button, to give MacOS permission to access your account information, then click the checkbox next to Applications you want to authorize the use of your data. Conclude the process by clicking the end button.
Congratulations, if all went well, you have associated your Google account with your Mac. To manage the account settings from your Mac, go to the menu at any time System Preferences> Internet Accounts, then select the profile name to be edited in the left sidebar.
How to activate the Google account in Chrome
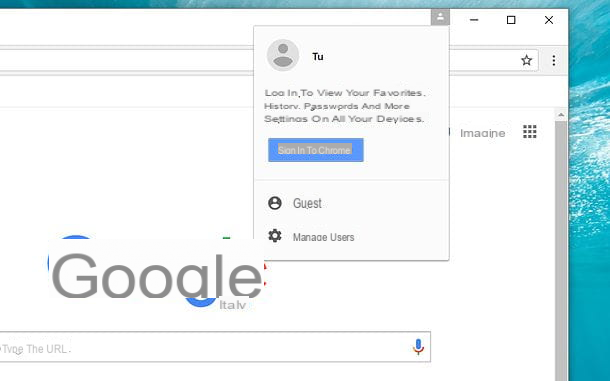
Another useful operation to do with your Google account is to connect it with the Chrome browser, if you use the latter to browse online. By activating your Google account in Chrome, you can synchronize your data, extensions, passwords and searches on any PC or device associated with the same account.
To proceed with the activation of your Google account in Chrome, open the browser and click on the image profile you see at the top right of the browser window. Press, therefore, the login button and sign in with your Google account (if you have activated 2FA, you will also need to enter an OTP code). To activate data synchronization, click on the corresponding button in the box that appears after selecting the avatar.
You can also always add other accounts by clicking on the avatar at the top right and then on the Add button. Still from the same menu (that of the avatar) it is possible to manage and possibly disable Chrome data synchronization by pressing the appropriate buttons.
How to activate the Google account on smartphones and tablets
Having described the procedure for activating a Google Account from Windows PC and Mac, I think it is also useful to know how to activate Google Account on smartphones and tablets.
How to activate Google account on Android
You recently bought a new smartphone or tablet, Android and want to sync a new Google account with your old device? Then I think I can help you with the following tips.
Google Account Sync happens automatically after you add an account to your device, the rest of what you need to do is to verify that the sync happens regularly. Before moving on to the above procedure how to enable Google Android account sync, let me explain how to associate Google account on Android.
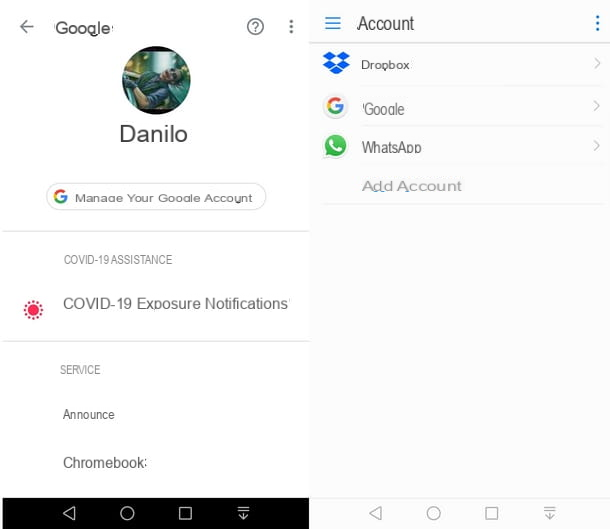
The procedure itself is simple and quick: go to the settings menu, the recognizable by a gear icon and accessible from the application menu of your device, then select the Account item. Next, press the Add account option and select Google from the available options.
Now it's time to enter the Gmail Address, and tap the forward button. Now enter the password in the next step, and press the forward key to continue (if you have enabled 2FA, you will also need to enter a verification code). In the new step, you can enter your phone number with the Yes I Accept key or skip this step by tapping the Skip button.
Next, accept Google's terms of service by tapping the I accept button, after a short wait, the Google account connects to your Android device. The first time you connect to your account, the information synchronization starts automatically.
Before moving on to the synchronization verification procedure, I remind you that if you are using a device without Google services, such as a smartphone or tablet with HUAWEI AppGallery, synchronization is not available, unless you have changed the device software by installing the appropriate Google.
If, on the other hand, you have already added one or more accounts to your Android smartphone or tablet, you may need to verify that synchronization is still active (or was activated correctly when you added the account). This check is possible by going to the settings menu and tapping the Account item, then choose Google from the options in the list.
Then tap Gmail email address to request synchronization and verify that the Slight are active (blue) in correspondence with the Calendar, Contact, People details, Drive and Gmail items. Otherwise, proyields to their activation with a tap on them.
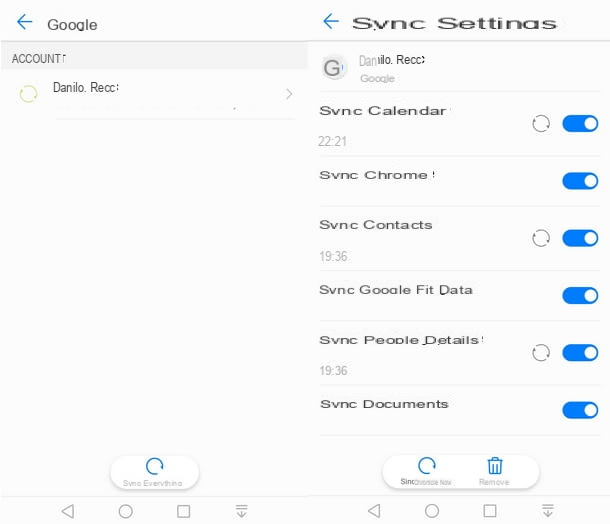
In this way you have ensured that the synchronization of the information contained in your Gmail account is synchronized with your Android device. Multimedia content such as Images and Video as for this type of content it is necessary to resort to specific applications such as Google Photos.
How to activate Google account on iPhone and iPad
The activation and synchronization of Google View for devices with Android operating system is also available for iPhone and iPad, although in a more limited way.
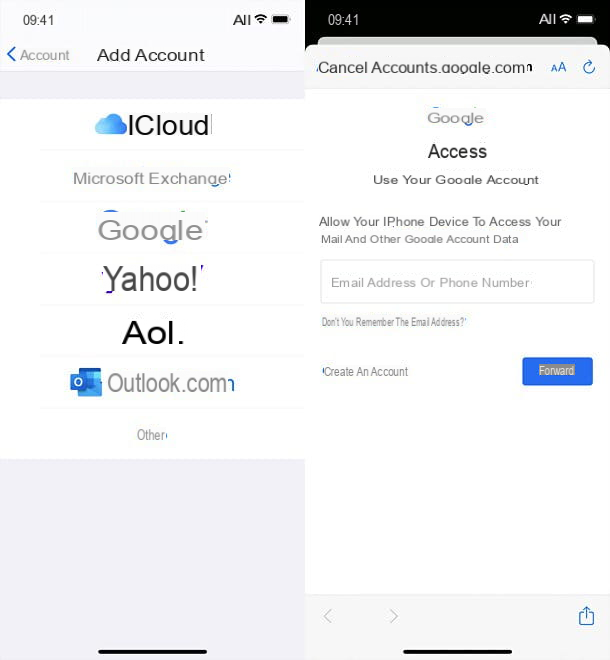
To get started, go to the settings menu (the gear icon on the home screen or in the app library) and within it, tap the Mail, Account and Add account items. Now, press the Google logo and then on the Continue button to enter yours Gmail Address in the respective field. Once done, press the forward button and repeat the operation for the password (if you have enabled 2FA, you must also enter a disposable verification code).
In the new screen you can decide the Google account information to synchronize with the device, to do this move the toggle up ON next to the Mail, Contact, Calendars and / or Note: To finalize the configuration, press the Save button.
Congratulations, you have synchronized your Google account with your Apple smartphone or tablet. But pay attention to the synchronization of contacts, because another provider (e.g. iCloud) may be used by default. To fix this, go to the menu Settings> Contacts> Default account and choose the Gmail option from there. By doing this, you have set the Gmail account as the primary account for syncing contacts.
You can return to the account menu at any time Mail (Or even Contact) to modify or delete accounts previously entered for syncing. As on Android, syncing photos and videos requires a different procedure.
How to activate a deactivated Google account
Have you recently noticed that you can no longer access your Google account and related services, including Gmail and Google Drive? It may happen that Google deactivates an account if it believes that the rules have been violated. In the Terms and Conditions section, it mentions to us that it can happen in case of creating profiles that do not respect age limits, or because hacking activities are detected.
In cases like this, what you need to know is how to activate a deactivated Google Account. In other words, understand how to reset the Google account , through a specific appeal procedure.
Of crucial importance is the moment when you start this procedure. In fact, it is better to act as soon as possible with the opening of the appeal, because Google may decide to permanently delete your account.
The times of deletion of your account and all your information are usually notified in the notices sent by Google. In any case, if you intend to at least try to regain access, I suggest you proceed quickly. Also, I point out that it is possible to proceed with recovery only for accounts that you actually own.
Start by connecting to the login page and try to enter your login information, such as email address orphone number , then press the forward key and enter the password then press the forward button again.
Now press the Try to restore button and follow the on-screen wizard where it is very important to also enter an email address where Google can contact you for future communications regarding the restoration of your account.
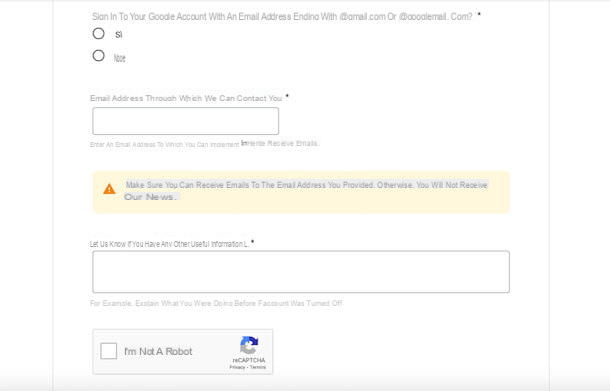
If the procedure does not go as expected, it is possible to connect to the dedicated Google Help Center page for recovery and resort to using the appropriate form. Also in this case fill in all the required data on the screen, indicating also how your account ends: whether with @gmail.com or @googlemail.com.
Also remember to enter an alternative email address where to be contacted and to add the information that you think may help Google to resolve your case.
Finally, check the box corresponding to CAPTCHA to confirm that you are not a robot and press the Submit button. From the moment of submission, Google has time for two business days to analyze your request and inform you of the decision at the email address you indicated in the form. If successful, you will be able to use your account as before, including all services connected to it.