Enable DHCP service on Windows 7
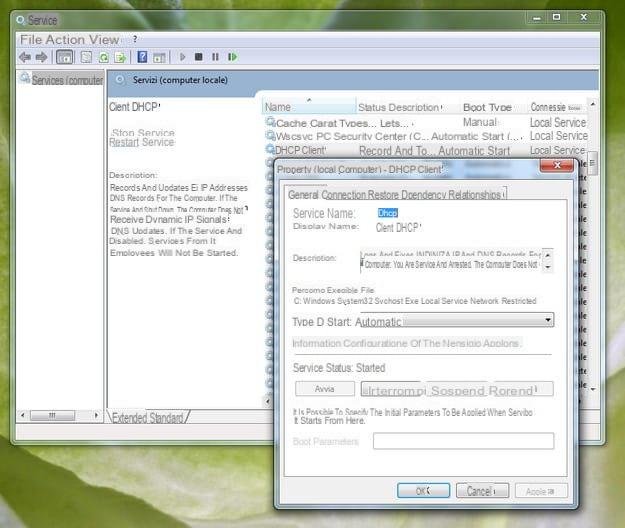
Be vuoi scoprire how to enable DHCP Windows 7, the first step you need to take is to activate the DHCP service on your system. To do this, click on the button Home Windows (the flag icon located in the lower left corner of the screen), type the command services.msc in the quick search bar and press the button Submit on the PC keyboard, to access the Windows Services configuration panel.
In the window that opens, look for the entry DHCP client and double click on it. At this point, make sure that in the drop-down menu Startup type the item is set Automatic (otherwise set it yourself) and click on first starts and then OK, to start the DHCP service on the computer.
Enable DHCP in network connections on Windows 7

Once you have launched the DHCP client service and set it to run automatically, you need to configure the network connection so that it accepts the automatic configuration by the router, to access the Internet. Let's see how it's done.
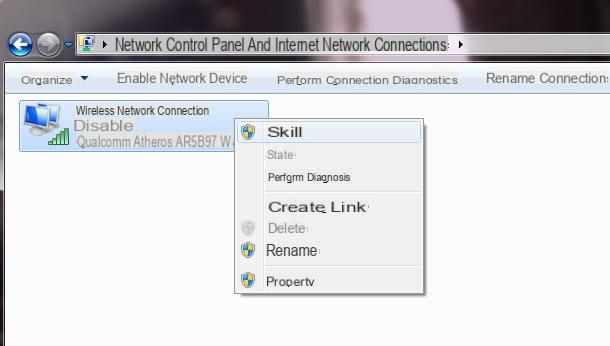
First, right-click on thenetwork icon placed in the notification area (next to the Windows clock) and select the item Open Network and Sharing Center from the menu that appears. In the window that opens, click on the name of the Internet connection located in the right sidebar (eg. Connect to the wireless network o Connection to the local LAN) and click on the button Property.
Then select the item Internet Protocol versione 4 (TCP / IPv4) from the list that appears (by double clicking on it), put the check mark next to the items Ottieni automatically an IP indirizzo e Ottieni indirizzo DNS server automatically and click on the button OK per salvare i Cambiomenti.
Done! This way you have completed the steps for enable DHCP Windows 7 and therefore you should be able to connect to the Internet even from your notebook, which used to be a tantrum.
Enable DHCP on the router
For DHCP to work on any computer, equipped with Windows 7 or any other operating system, it must also work on the router used to connect to the network this function is enabled.
Unfortunately I cannot give you very precise instructions on this, as each brand of router has an administration panel structured in a different way, in any case I will try to be useful by giving you some general "tips" on what to do.
The first step you must take, of course, is to connect to the administration panel of the router: to do this, make sure you are using a computer (or a mobile device) connected to the network generated by the device (even better if via Ethernet cable), open the browser you generally use to surf the Internet (eg. Chrome) and linked to an address between 192.168.1.1 e 192.168.0.1 (which are the default addresses used by most routers).
At this point, in the login page of the administration panel, if you do not know what to enter, try to enter a combination between admin / admin e admin / password (which are the most used predefined combinations). If the coordinates and the username and password combinations I just provided are not correct, try following my tutorial on how to access the router to understand how to overcome the impasse.
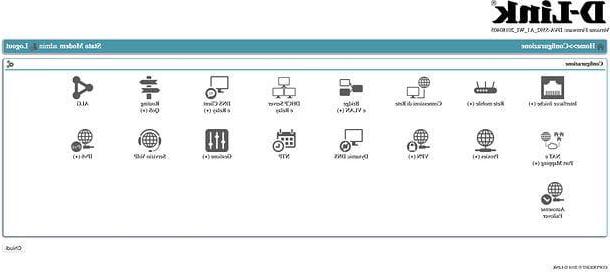
Now, according to what are the configuration menus of your router, go to the panel dedicated to configuration , then in the section dedicated to server DHCP and, if necessary, activate the item relating to this functionality (then click on the save button).
If you want, you can also make sure that the router always assigns the same IP address to a particular device: this option can be called booking addresses o IP configuration and can be available in a dedicated panel or in the panel where all the devices connected to the network. To use it, simply select the device of your interest, among those connected to the router, indicate the local IP address to be assigned and click on the button to save the changes.
If, despite my indications, you have not been able to activate DHCP on your router, as you cannot find the exact menus to do so, you can consult my guide dedicated specifically to how to enable DHCP and / or the guides that I have dedicated to various models of modems and routers: D-Link, TP-Link, Netgear, TIM / Alice, Fastweb and Wind / Infostrada.
Troubleshooting
At this point you should be able to enable DHCP on Windows 7. If not, try to repeat all the steps illustrated in the previous chapters of this tutorial and restart your PC.
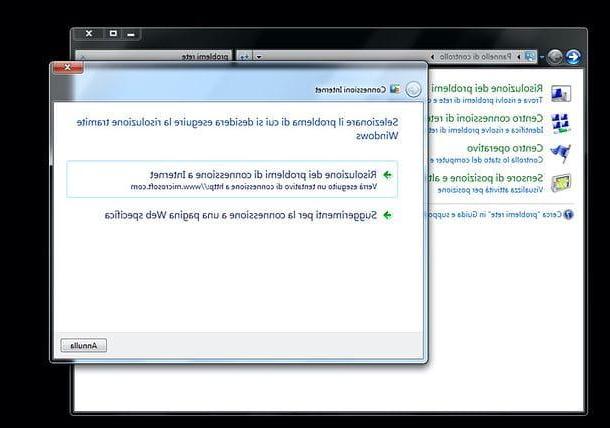
If the situation does not improve in this way, try to use the tool troubleshooting present in Windows 7. Then click on the button Home (the flag icon located in the lower left corner of the screen) and select the item Control Panel give the menu to compare.
In the window that opens, type the terms "network problems" in the search field located at the top right and click on the item Find and fix network and connection problems present in the search results.
Fatto ciò, click on your button NEXT present in the window displayed on the screen, go to Internet connection troubleshooting and wait a few moments for a network status check to be carried out.
Within seconds, Windows should be able to detect any problems related to DHCP, or Internet access, and fix them. If not, you can click on the button Review additional options and access additional resources to help you resolve the problem (e.g. the tool to perform a system recovery or request direct assistance from Microsoft).
How to enable DHCP Windows 7