Preliminary operation
As I told you at the beginning of the article, the reason why, in most cases, a black band on eMule icon it is because, in the router used to access the Internet, the ports that the program uses to receive incoming connections and communicate with the outside have not been opened.
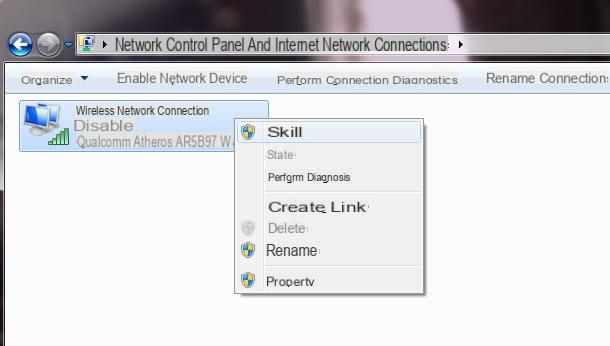
To solve the problem, it is therefore necessary to identify which ports are used by eMule. To do this, start the program by double clicking on its collegamento present on the desktop or on its entry in the Start menu.
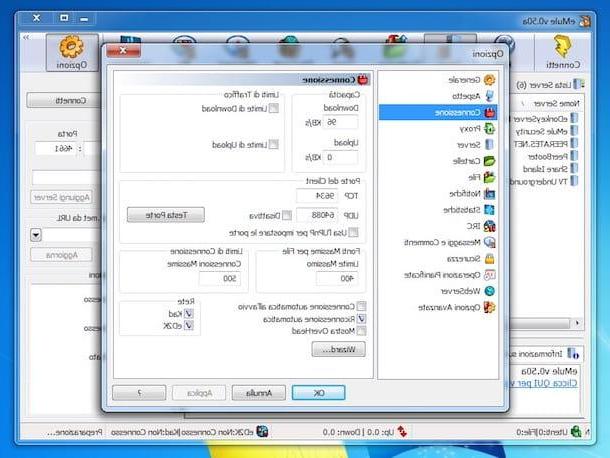
At this point, once the main window of eMule is displayed, click on the button options located at the top right, select the item Connections from the side menu of the newly opened window and check the values indicated in the fields TCP e UDP.
The most frequently used ports are the 4662 and 4672In this regard, considering that some Internet providers are used to limit P2P traffic on the most commonly used ports (which could lead to the appearance of the blindfold on the eMule icon), I suggest you change these values, if any, with higher numbers, for example 28823 e 5643.
Open the doors of eMule

Having completed the preliminary steps mentioned above, let's get to the real heart of the matter and let's find out, therefore, what are the steps that must be taken to be able to disband eMule on Windows 7. As I told you, the problem is, in almost all cases, due to the fact that the doors used by the program have not been opened in the configuration panel of the router. So let's see how to solve.
To begin with, start the browser you generally use to surf the Net from your PC (eg. Chrome) and type, in the address bar, 192.168.1.1 or 92.168.0.1 (which are the default IPs of most routers), then press the button Submit on the keyboard. If the addresses you typed are not correct, read my guide on how to find the IP address of the router to find out how to fix.
When asked to enter a username and password combination, try admin / admin or with admin / password (even then, these are the default values for most routers). If the combinations just suggested are incorrect, read my guide on how to enter the router to immediately understand how to remedy this.
At this point, you should finally be in front of your router's internal panel. Therefore, try to identify the section dedicated toport forwarding (otherwise called port forwarding), at port mapping or to virtual server, click on the button for create a new rule or new virtual server and fill out the form that is proposed to you by following the instructions you find below.
- Initial / internal port - enter the number of the TCP port or the UDP port of eMule (one rule must be created per port).
- Final / outer door - enter the same value entered in the field dedicated to the "Initial / internal door".
- Port type / Protocol - choose "TCP" or "UDP", depending on the type of port to open in the router.
- Destination IP / Server IP address - type the local IP address of the computer on which you intend to use eMule. If you don't know it, you can check out my guide on the subject to find out right away.
- Name / Description - enter a name of your choice to identify the rule (eg "eMule TCP" or "eMule UDP").
After filling in all the fields of the form as indicated, click on the button Apply / Save to save the newly created rule. Next, start creating one new rule for the other eMule port by following the same steps above.
Unfortunately, I cannot be more precise on what to do as the terms change from router to router and, personally, I do not know the exact make and model of the device in your possession. However, if this can help you, below you will find some of my specific guides by router model and by reference manager.
- How to configure TIM / Alice router
- How to configure Fastweb router
- How will I configure Infostrada router
- How to configure TP-Link router
- How to configure D-Link router
- How will I configure Netgear router
After opening the doors of eMule in the router management panel, try again to connect with the program to an eD2K server and to the KAD network: if the blindfold no longer appears on the eMule icon and the connection is successful, the problem is solved, otherwise go to "plan B", the one you find indicated in the next step of the guide.
Configure the firewall for eMule
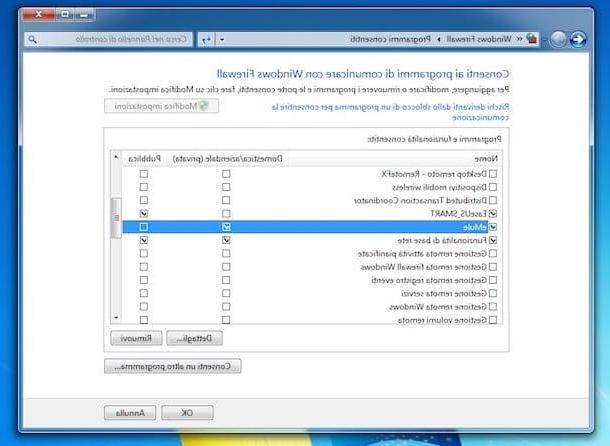
The "plan B" is to check that eMule is authorized in the firewall Windows 7. This version of the operating system from Microsoft, in fact, like all subsequent ones, integrates a firewall that protects the PC from intrusions and which, if not configured correctly, can negatively affect the functioning of eMule.
So, to configure the firewall in such a way as to be able to disband eMule, click on Start button (I cheer with the windows flag) located at the bottom left of the taskbar and select the item Control Panel give the menu check if you press.
In the window that is now shown on the screen, select the item System and securitywhy are you cheating? Allow program with Windows Firewall (if you can't find the entries in question, enable viewing by Category in the drop-down menu at the top right).
Next, locate eMule in the list of programs added to the firewall and verify that there are check marks in the corresponding boxes in the columns Household / business (private) e Public. If they are missing, to authorize the program to connect to the Internet, press the button Change settings located at the top and put the check mark on the boxes mentioned above.
If eMule is not present in the list of authorized programs in the firewall, add it by pressing the button Allow another program located at the bottom right, by clicking on the button Shop by Department, selecting the executable emule.exe from the folder where you installed or extracted the software and pressing the button Add. Next, adjust the firewall settings for the program by proceeding as I indicated earlier.
Now try connecting with eMule again and everything should be fine. If not, try the steps in this and previous step of the tutorial again and make sure you have done everything as directed.
Other useful operations

Finally, and for the sake of completeness of information, I want to point out other operations that can be useful to use eMule in the best way and, above all, to download files at the maximum possible speed.
The first operations to which I refer are theeD2K network servers update and reset the Kad network settings. To find out how to proceed, follow the instructions on what to do that I have provided you in my guides dedicated specifically to how to update the eMule servers and how to connect to the Kad network.
In case you are not aware of it, I would like to point out that eD2K e Kad are the two networks on which the operation of eMule is based: the first is a centralized network, which means that there are some servers that catalog the files shared by users and allow them, or rather clients, to upload and download files from eMule. It should be noted that the possible closure of the servers would make eMule unusable.
The Kad network, on the other hand, is not server-based (for which it is called serverless) and, for this very reason, it is not subject to closure. To put it in "pennies" terms, within the Kad network each computer is transformed into a small server, consequently the users communicate directly with each other, without having to go through a support server.
How to disband eMule Windows 7