A thing serve l'NFC

You have decided to inquire about the usefulness of the technology NFC and to evaluate if this is compatible with your needs? In this case, let me give you some more information on the subject.
NFC is short for Near Field Communication (a phrase that, in cittàn, can be translated as "communication in proximity") and defines a technology that allows the exchange of data between two devices located at short distances, wirelessly and without requiring the insertion of a PIN or password to the association.
This, however, does not represent a security problem: the information in fact transit in a manner encrypted and the receiver and transmitter are activated practically at the same instant; moreover, an NFC-type communication requires that the devices involved are at a very short distance (in some cases, they must even be in physical contact), which adds an additional level of security.
As for practical uses, NFC has multiple uses: this type of connectivity can be used to perform contactless payments, via smartphone or smartwatch, in authorized shops, for pair Bluetooth devices together quickly or to do it file exchange between two compatible smartphones (or tablets). Read more here.
The theme of this guide will be, precisely, to explain to you how to activate NFC on Android and how to take advantage of this technology in the scenarios I described to you a little while ago.
How to activate NFC on Android
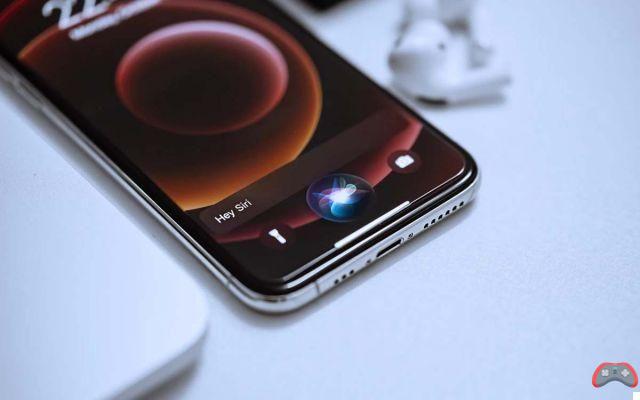
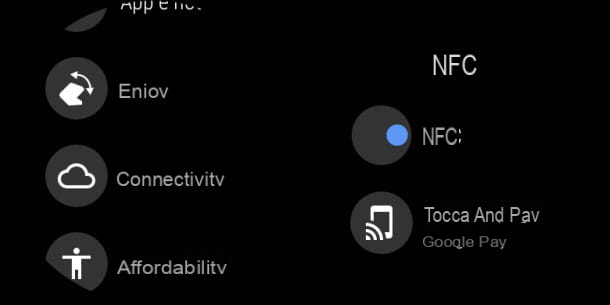
If your Android device is compatible with NFC technology, activating this type of connectivity is really a breeze! To do this, open the Settings of the device, by tapping on the icon ofgear resident on the Home screen, or in the drawer, tap on the items Connected devices, Connection preferences ed NFC and move the lever located at the top of the next screen from OFF a ON.
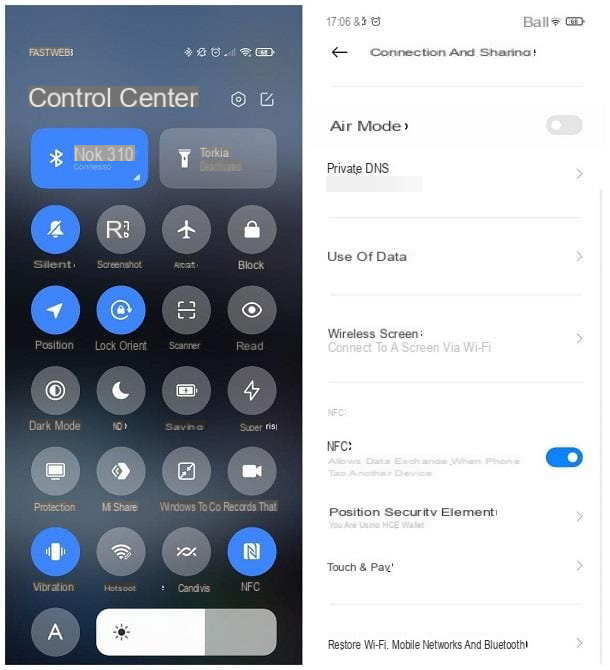
Depending on the version of Android on your device, the menu items may be different: on Xiaomi devices, for example, you need to reach the menu Settings> Connection and sharing> NFC; on Huawei terminals the path to follow is Settings> Device Connection> NFC, while on Samsung devices you have to go to the menu Connections> NFC.
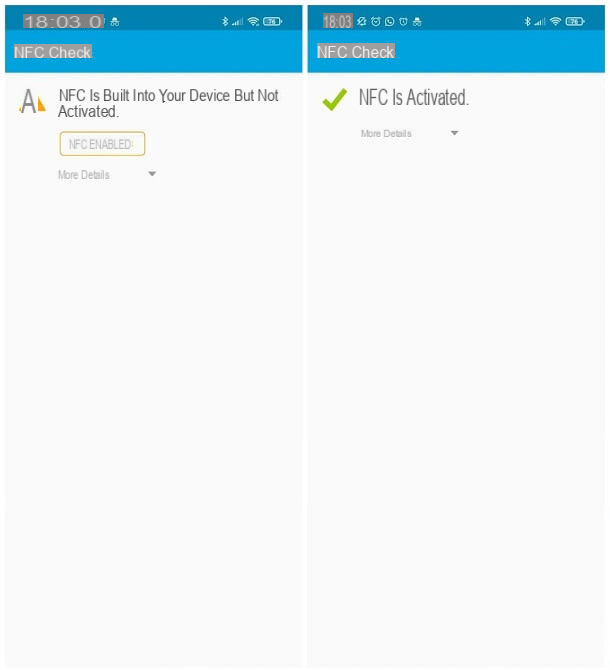
If you do not find the NFC option in the device settings menu, it is very likely that this technology is not supported; to make sure, you can use the app NFC Check by Tapkey, available for free both on the Play Store and on the alternative markets dedicated to devices without Google services.
To get it, open the reference store of your device, use the integrated search function to locate the app and, when you have found it, press the button Install, to download it.
When the download is complete, start the app and wait for the NFC check result: if you see the message No NFC module was found on your device, your device does not have NFC connectivity and, therefore, you will not be able to use this technology.
If, on the other hand, you should see the message NFC is built into your device but not activated, it means that your device is compatible with NFC connectivity, but that it is "off": to activate it, tap the button Activate NFC and use the Android system menu to enable the aforementioned connectivity. Finally, if you see the message NFC is activated, then the NFC chip is present on your device and properly activated.
Enable NFC on Wear
How do you say? Own one SmartWatch equipped with NFC chip and equipped with the operating system Wear (Eg Wear OS)? In this case, you will be pleased to know that you can take advantage of this type of connectivity to pay in physical stores in contactless mode, using a compatible payment system.
To enable NFC on Wear, first activate the watch screen, then swipe from top to bottom near the top of the screen and tap the icon depicting a gear, in order to access the operating system settings.
Now, scroll down the next screen until you find the entry Connectivity , tap on it, select the item NFC and move the switch corresponding to the wording of the same name from OFF a ON. Now, tap on the option Touch and pay, choose the item Google Pay among the options proposed and configure the payment app on the smartphone paired with the watch, following the instructions in one of the following sections of this guide.
How to use NFC on Android
Currently, as regards devices animated by Android, NFC technology can be exploited in at least three situations: to pair Bluetooth devices, to pay with the smartphone or to transfer data. Below I am going to provide you with all the necessary information.
Connecting Bluetooth devices
If you own a couple of Bluetooth headphones, a Bluetooth speaker or any other wireless device compatible with NFC technology, you can easily pair it with an Android smartphone, simply by putting the two devices involved in physical contact (generally back-to-back).
First of all, set up the Android terminal to receive NFC / Bluetooth connections: call up the notification area of the device, swiping from the top of the screen downwards, slide your finger down again at the quick icon and make sure the icons of NFC e Bluetooth are active. If not, press both of them to “illuminate” them.
If the special "tiles" are not visible, tap on the symbol of pencil located in the lower left corner of the notification area (or press the button Modification, visible after the last row of quick icons), find the icon of NFC among those currently not visible, make a long tap on it and, keeping your finger pressed, drag it to the upper panel of the notification area, in the position most congenial for you. If necessary, repeat the same operation for the icon of the Bluetooth.
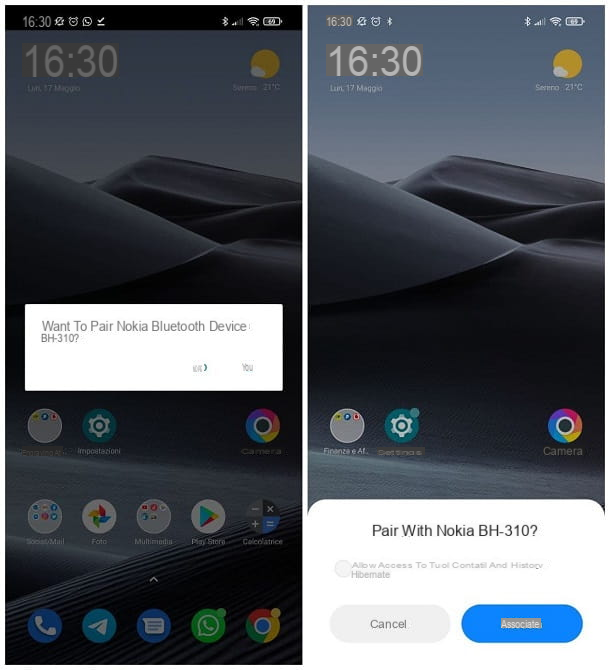
Once this is done, take the NFC device to pair with the smartphone and, after turning it on, set it to pairing mode: In most cases, it is sufficient to press the power button for a few seconds, until the status LED starts flashing rapidly and / or audible feedback is received.
Now, place the Bluetooth device in correspondence with the NFC chip of the Android phone, whose screen must be unlocked (usually you have to overlap the rear parts of the devices involved) and follow the instructions you receive on the screen, to finalize the association between the two devices : Generally, it all boils down to pressing buttons Yes e Associate, which appear on the Android phone screen.
Contactless payments
Another usage scenario for Android devices equipped with an NFC chip concerns the contactless payments through payment apps (such as Google Pay or Bancomat Pay, just to name a couple) that provide this possibility.
In other words, you can configure your credit card within the dedicated app, to make a contactless payment in a commercial establishment equipped with POS compatible with the chosen circuit: in principle, it is sufficient to unlock the phone and bring it close to the terminal to complete the transaction.
To understand this better, let me explain how the NFC payment system available with the service works Google Pay: therefore, check that your payment card has been issued by a banking institution participating in the service (here is the complete list) and which is part of the Visa, Mastercard or American Express circuits, those currently supported by Google Pay. Also, make sure you remember the Google account password set up on your device, as you may need it.
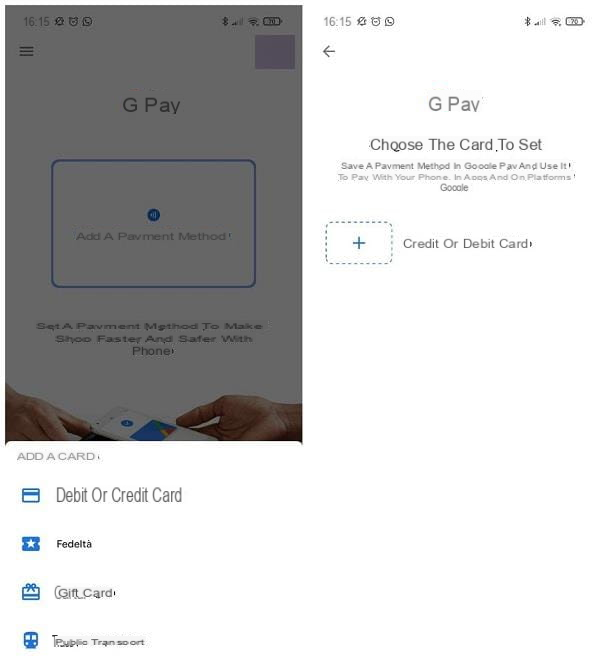
Once the necessary checks have been completed, download the app Google Pay on the device: start the Play Store, search for the name of the app using the appropriate bar and, after finding it, tap on its name and then on the button Install, so as to transfer it to your device. When installation is complete, open the application, tap the button Start and specifies whether or not to allow the use of location servicesby touching the button Allow while using the app, or Reject.
Now, you are ready to configure your payment card: click on the button Add a card visible on the Google Pay home screen (if you don't see it, tap the buttons Payments e + Payment method), indicates that you want to add a Debit or credit card and enter i card details in the appropriate fields.
To be precise, you will need to specify the number of the card, the Expiration date (inserting the month and the last ones two digits of the year, without spaces or separating symbols) and the CVC code printed on the back of the card itself; enter the necessary information, check that the Cardholder's Name and that the address and billing information is correct (otherwise tap the pencil, to change them) and tap the button Save, to add the payment card to Google Pay.
In a few moments, you should see a panel indicating that you can use the card for both in-store and online purchases. If you should see a message regarding the unavailability of payments in the store, you may have inserted an unsupported card, or the device you use may not be safe for payments via NFC (which is true, for example, following the unlocking of permissions root).
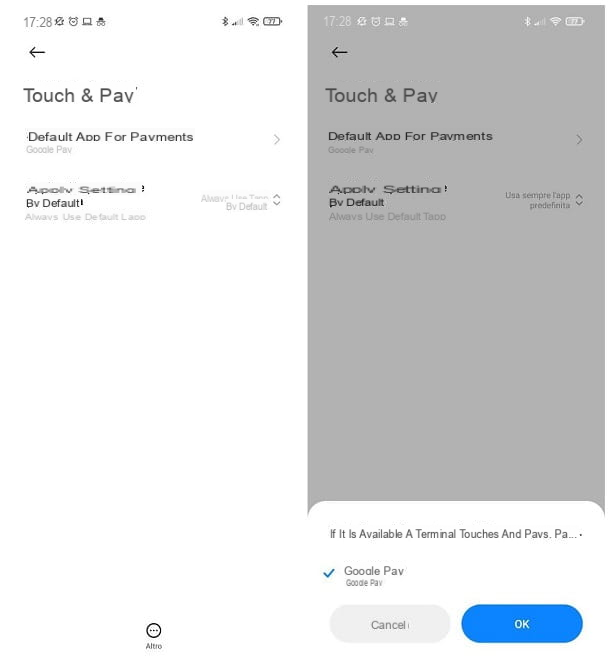
Now, all you have to do is set Google Pay as the default payment system: to do this, open the menu Settings> Connected devices> Connection preferences> NFC, tap on the items Contactless payments e Default payment app e scegli l'opzione Google Pay, among those proposed.
Please note that on some devices the path to follow may be slightly different: on Xiaomi smartphones, for example, you can choose to use Google Pay as the default payment app by going to the menu Settings> Connect and share> Touch & Pay> Default payment app.
Once the Google Pay configuration is complete, to make payments through the shops that support the "Big G" payment system, simply unlock the phone and bring it to the Google Pay enabled POS, even without opening the app: the payment will be completed automatically, within a couple of seconds and a notification message will be shown on the phone display indicating the transaction has taken place. For more information on Google Pay, you can take a look at the specific tutorial I dedicated to the topic.
Finally, I would like to point out that all contactless payment cards use NFC technology to interface with enabled terminals: for more information, take a look at this guide of mine.
Note: after configuring Google Pay on an Android smartphone, you can also use the same payment cards on any smartwatch Wear equipped with NFC paired with the phone. All you have to do, in this case, is download the Google Pay app on the wearable device, open it, tap the button Start and, if necessary, set the screen lock.
File transfer
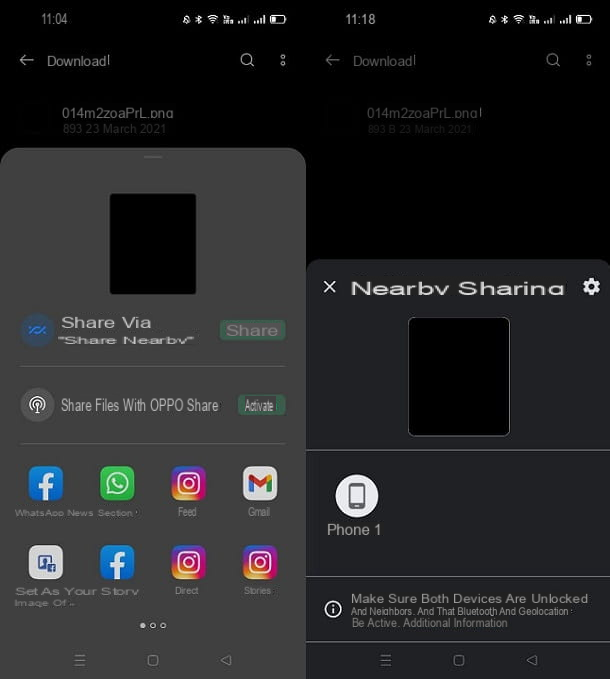
On some Android terminals, it is also possible to take advantage of the NFC system to transfer files through the feature Android Beam: this possibility, however, has been eliminated starting from Android Q and supplanted by the more efficient Sharing nearbythe Nearby Share, which does not use NFC but a combination of Bluetooth and Wi-Fi, similar to Apple's AirDrop.
However, if your device has a version of Android lower than the 10 (you can check this by going to the menu Settings> About phone / device> Android version), you can send and receive to and from a second NFC device, using the Android Beam app.
How? I'll explain it to you right away. To get started, make sure that NFC is active on both devices, so take the one that contains the file to send, open it and tap on the icon sharing, usually visible at the bottom (and having the appearance of three connected dots or one box with up arrow).
Now, tap on the icon Android Beam, visible on the panel that appears immediately after, unlocks the second device (the one to which the item is to be sent) and overlaps the two devices, placing them back-to-back. Finally, answer the affirmative transfer request that you should see on the target phone and wait for the copy of the file, which will be stored in the Downloads folder, to be completed.
As I mentioned at the beginning of this section, file sharing via Android Beam is quite outdated; for this reason, I advise you to act using the aforementioned Nearby Sharing, which I told you about in my guide on how to transfer files to Android.
Other uses
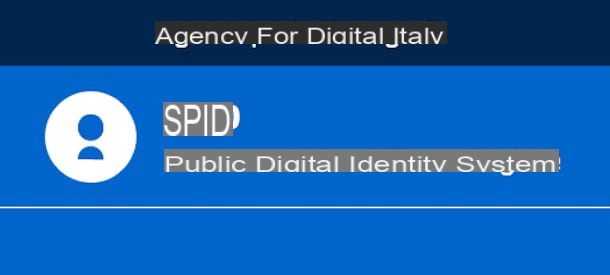
NFC can also be used for other purposes, such as scanning the chip in the CIE (Electronic Identity Card) to identify themselves during the identification request process SPID from home: if you want to know more, read my guide on how to get the SPID.
How to activate NFC on Android