Preliminary information

Based on your needs and preferences, as I said at the beginning of the post, for install Windows on Mac for free you can choose between two different options: you can install the operating system from Microsoft on a separate partition of the Mac disk (thus having the opportunity to choose which operating system to run each time the computer starts, or you can virtualize Windows running it in macOS.
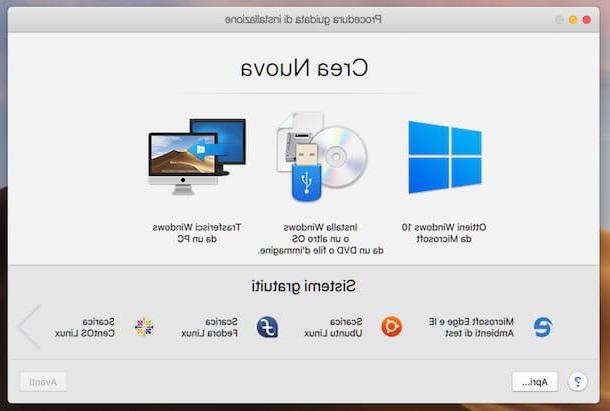
In the first case, you can rely on Boot Camp Assistant, an application included "standard" in all the most recent versions of macOS, which guides the user in installing Windows on Mac, downloads all the drivers necessary for the functioning of the Microsoft operating system from the Internet, performs the copy the Windows ISO image to a USB stick (if necessary) and create the partition useful for finalizing the installation on the disk.
As for the virtualization discourse, however, you can rely on some appropriate software that allow you to create and run Windows (and not only) in the form of virtual machine, inside which it is possible to “run” the operating system without actually having to install it on the computer (therefore without partitioning the disk).
Regardless of the solution you choose, first of all you have to worry about finding the installation disc of the version of Windows you intend to use, if your Mac has a burner or if you have connected an external one, or the relative one ISO image.
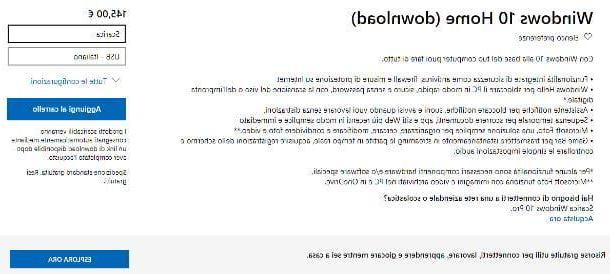
In the second case, you can download Windows directly from Microsoft's website. To find Windows 10 visit this page while to get Windows 8.1 go to this other page. Next, select theedition of the OS you are interested in from the appropriate drop-down menu and press the button Confirmation. Then indicate the language e preco ancora sul pulsado Confirmation. Finally, choose whether to download variant a 64-bit or that a 32-bit and press pulsating Download.
To find Windows 7instead, visit this other web page, enter the product key of the OS in your possession in the appropriate field located at the bottom, click on the button Verifica and follow the instructions given on the screen. In this case, however, please note that the download can only be performed by providing a valid product key and only for retail versions Windows 7 (i.e. those that were purchased in stores and are not pre-installed on PCs).
More information on this is available in my guides on how to download Windows 10, Windows 8 and Windows 7. I also point out that if you have the Windows installation disk, you can get the ISO file of the operating system from it, following the instructions I gave you in my tutorial on how to extract ISO files from CDs and DVDs.
Another papabile solution is to use virtual machines ready to use, or virtual hard disks which, once mounted in virtualization software, allow you to directly run the system they contain, without having to install them first.
You can download ready-to-use virtual machines from Microsoft's website for testing Edge e Internet Explorer: to do this, select the virtual machine you are interested in from the drop-down menu Virtual machine, the target software from the menu Select platform and proceed with the download by pressing the button Download .ZIP which appears below.
How to install Windows on Mac with Boot Camp
Having made the necessary clarifications above, let's get down to business and let's find out, in practice, what needs to be done to be able to install Windows on Mac for free using Boot Camp Assistant.
Before proceeding, however, consider that you must have one Internet connection sufficiently performing (as all drivers and support files will be downloaded from the Internet to make Windows work on macOS, for a total of over 1 GB of data), of at least 30 GB of disk space (depends on the version of Windows to install) and at least 2 GB of RAM (always depends on the version of Windows to be installed).
Always as a preventive measure, get yourself one USB pendrive to be connected to the Mac. As for the capacity, it must be at least 2 GB if you install Windows from floppy disk or at least 8 GB if you install it via ISO file (which is copied right on the stick, together with the drivers). Only in the case of MacBook Pro (2015 and later), MacBook Air (2015 and later), MacBook (2015 and later), iMac (2015 and later), iMac Pro and Mac Pro (late 2013) the use of the USB key does not it is required, as the internal drive of the computer is used temporarily to store the elements needed to install Windows.
That said, the first move you need to make in order to use the Boot Camp Assistant is to start the application by clicking on its icon (Quella with i two hard drives in the stack) found in the folder Other of Launchpad.
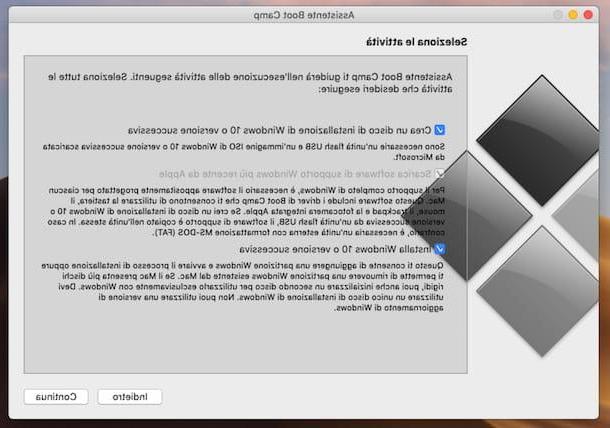
In the window that is shown to you on the screen, click on the button Continue and check that all available options are checked, so that download drivers for Windows e create the partition in which to install the OS. Then, press the button again Continue and, if required, indicate the destination disk.
At this point, click on the button once again Continue and wait for the driver download to complete, after which Boot Camp Assistant will automatically create the key with all the files necessary for Windows to work.
Once this is done, select theISO image Windows, authorizes the execution of the add-on Boot Camp Assistant named "agent", enter the Password MacOS administration tool in the window that opens and click the button Add assistant.
Then the disk partitioning procedure will start, through which a space will be created on the hard disk to be allocated to Windows. So, select the HDD for which you are interested in going to act (you can also select an external hard drive), choose the option Create a second partition for Windows and click to lock your button Continue.
Then use the indicator in the partition graph to specify the amount of space you intend to dedicate to Windows, and click the buttons Install e Continue, to finalize the procedure.
After completing all the steps above, the Mac will restart and start theWindows installation. The procedure to follow is the same that usually must be carried out on a PC when a new copy of the operating system is installed or when the computer is formatted. All you have to do is follow the instructions on the screen and adjust the various settings according to your needs, as I explained in detail in my guides on how to install Windows 10, Windows 8 / 8.1 and Windows 7. Regardless of the version of Windows you are installing, but remember to select BOOTCAMP as the target disk of the operating system and to format it and also provide the product key of your copy of Windows.
Once Windows has been installed, if necessary, connect the USB key with the drivers that Boot Camp Assistant previously created to the Mac, open the folder BootCamp contained within it and starts the file setup.exe, in such a way as to go and install all the drivers needed to make Microsoft OS work well on your Mac.
Each time you log on to your computer, you can choose which operating system to use by holding down the key alt or that one option on the Mac keyboard.
How to install Windows on Mac for free without Boot Camp
As I told you, Boot Camp is not the only solution available to be able to install Windows on Mac for free. If the idea of dividing the hard disk into several partitions and assigning one to Windows does not appeal to you, you can in fact consider contacting programs through which virtualize the operating system from Microsoft and use it when macOS is running. To know all the details of the case, continue reading.
How to install Windows on Mac with Virtualbox
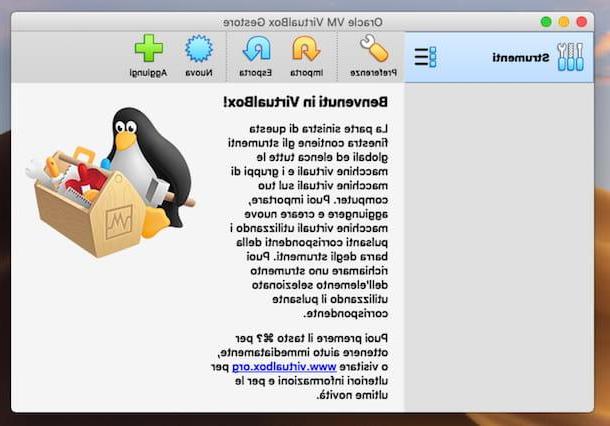
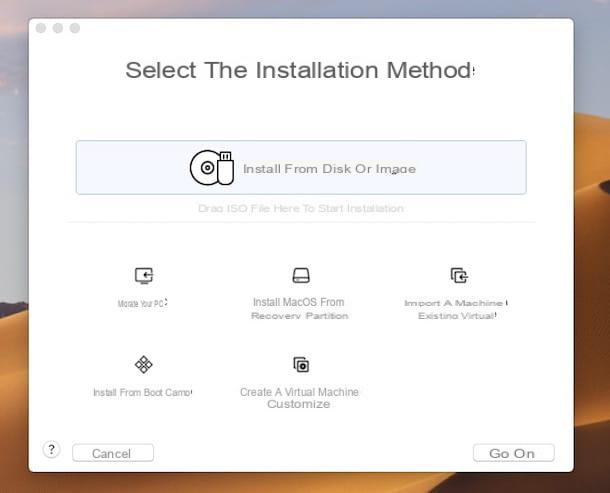
The first, virtualization solution you can consider choosing is VirtualBox. In case you have never heard of it, it is a totally free software distributed by Oracle, of an open source nature and compatible not only with macOS, but also with Windows and Linux. It allows you to create and run virtual machines of all popular operating systems and is fairly simple to set up.
To download it on your Mac, visit the program's website, click on the button Download VirtualBox xx located in the center and select the link OS X hosts.
Once the download is complete, open the package .dmg obtained and, in the window that appears on the desktop, double-click on the file VirtuaBox.pkg, in order to start the software setup procedure. In the new window that opens, click on the buttons Continue (twice) e Install, enter the Password of the MacOS administration and click on the buttons Install software e Close.
If you see a warning about thesystem extension blockedclick on your button Open Security preferences and, in the window of System Preference that opens, press the button Allow which is located at the bottom right.
Next, start VirtualBox by clicking onicon of the software (the one with the blue cube) which was added to the Launchpadclick on your button New located at the top left of the opened window, type the name you want to give to the virtual machine, select Microsoft Windows give menu to tendin Type, the version of Windows you are interested in from the drop-down menu Version and press pulsating Continue.
Then specify the quantity of RAM that you intend to allocate to the virtual machine (if you have no special needs or if you don't know where to put your hands, leave the default settings unchanged) and click on the button again Continue. Therefore, adjust the settings related to the virtual hard disk (By default, the option is selected Create a new virtual hard drive now) and click on the button Crea.
Now, you need to worry about specifying the file type of the hard disk to be used, the archiving system position and sizeby clicking on the button from time to time Continue and finally, then on that Crea.
Later, you can start the virtual machine by double clicking on its name on the left side of the VirtualBox screen. After displaying the relevant window, select the installation disc of Windows or the immagine ISO system, using the appropriate drop-down menu, and press the button Home.
The installation procedure of the operating system, the same that is proposed when the OS is installed on a PC or when the system is formatted. Later, you can activate Windows by entering the product key of the copy in your possession and you can recall the system by double clicking on his name in the main VirtualBox window.
To put the virtual machine on pause or to stop it, instead, you will have to right click on its name in the list and use the items in the menu that opens. For more details, you can read my tutorial on how to use VirtualBox.
As for ready-made virtual machines, to start using them, just click on the button Import located on the menu bar of the main VirtualBox window and select the virtual machine file.
How to install Windows on Mac with Parallels
Another solution you can consider to install Windows on Mac is Parallels. It is a virtualization software designed specifically for macOS, which integrates perfectly with the Apple operating system and guarantees high-level performance. However, it is not a free solution: the license to use the program costs 99,99 euros. Alternatively, you can opt for an annual subscription at a cost of 79,99 euros, which allows you to always have the most up-to-date version of the software. However, I have chosen to tell you about it in my guide, as it can be tried at no cost for a period of 14 days.
To download the trial version of Parallels on your Mac, visit the program's website, click the button Download the free trial version and then on the one with it written Download now.
Once the download is complete, open the package .dmg obtained and, in the window that is shown on your desktop, double-click on theicon Parallels Desktop (the one withiMac and the two bars vertically), to start the setup procedure. In the further screen that is shown to you, click on the button AcceptI inserted the Password of your user account, click on the button OK and wait for Parallels to be installed on your computer. If you want to avoid sending anonymous statistics regarding the use of the program, before starting the installation, remove the check from the appropriate box.
When the program starts, to create a virtual machine with Windows, click on the button Salta and, using the new window that opens, choose the option Install Windows or another OS from a DVD or external media image file or ISO file, dopodiché clicca sul pulsating NEXT, which is located at the bottom right.
At this point, click on your button Find automatically, to allow the program to automatically locate the correct source. Alternatively, select it yourself by dragging it into the program window or by clicking on the link first Select a file. Then click on the button NEXT, enter the license key Windows in the dedicated field and press the button again NEXT.
Specify, therefore, whether you will be using the copy of Windows you are installing for the productive or for play, click the button again NEXT, indicates the name you want to assign to the virtual machine and the percorso, choose whether or not to create a collegamento on the desk and press the button Crea.
Keep in mind that by doing so, all parameters related to the virtual machine will be adjusted according to the default settings. If you want to customize them, before proceeding with the creation of the virtual machine, check the appropriate option and take advantage of the items and menus in the window that is shown to you.
Once all the above steps have been completed, the operating system installation procedure will start. When completed, you will be able to use and manage Windows by selecting its name from the list that is shown to you by right clicking on theicon of the program on Dock bar and on the voice Control Center from the menu that opens, or using the collegamento added to the desk.
To add a ready-made virtual machine, however, all you have to do is click on the button apri located at the bottom left of the main program window and select the file of your interest.
How to install Windows on Mac with WMWare
Another software to create and manage virtual machines that you can consider is VMware Fusion. This is a very popular and appreciated solution but, even in this case, for a fee, with prices starting from 88,95 euros. However, I decided to tell you about it in this guide as it is available as a free trial with no limitations for 30 days.
To download the trial of the program, go to the VMware Fusion website, click on the link Download now located on the top right and then on that Download Now, which you find under the heading Try Fusion xx.
When the download is complete, open the package .dmg obtained and, in the window that is shown on your desktop, double-click on theicon VMware Fusion (the one with i two colored squares). In the further window that appears, type the Password of your user account and press the button Submit on the keyboard, then press the button Accept, select the option I want to try VMware Fusion XX for 30 daysclick on your bottone Continue twice, type la again Password of your user account and press the buttons OK e end, to conclude the setup. To avoid sending anonymous statistics, remove the check from the appropriate option.
If during the setup procedure a warning appears regarding the fact that thesystem extension has been blocked, click here Open Security preferences and, in the window of System Preference that opens, press the button Allow which is located at the bottom right.
At this point, you should see a warning that osascript requires checking System Events.app: click, then, on the button OK twice consecutively and then on the button Open System Preferences. In the window of System Preference that you now see, locate the icon VMware Fusion and check the box that you find in its correspondence. If you are unable to do this, click on the del icon first padlock which is at the bottom left, enter the Password of the Mac administration and click on the button Unlock.
Now you can finally proceed with creating the virtual machine. So, click on the buttons Install from disk or image e Continueselect il diskette or ISO file Windows and press the button again Continue. Alternatively, drag the disk or image file of your interest directly to the top of the program window.
Subsequently, set the use of the virtual machine according to your actual needs, by clicking on the button from time to time Continue, and finish the setup by pressing the button end. Afterwards, the installation procedure Windows: the same that is performed when the OS is installed on a PC or when the system is formatted. During the setup, you will have to worry about adjusting, through the appropriate wizard, the settings Windows if you need to provide the relevant product key.
When necessary, you can recall and manage the virtual machine by right clicking on theicon of the program on Dock bar, selecting the item Virtual machine library from the menu that appears, then the virtual machine of your interest in the window on the desk and using the buttons located at the top.
To open a ready-made virtual machine, instead, click on the item Import an existing virtual machine present in the main window of VMware Fusion, select the relative file and wait for the virtual machine to load.
How to install Windows on Mac for free