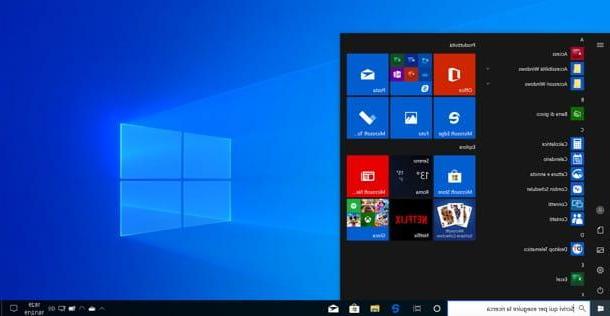
How to switch from Windows 10 to Mac
Switch from Windows 10 to Mac it is not difficult at all: it all lies in understanding some dynamics underlying the operation of macOS, slightly different from those in use on the Microsoft operating system, and in transferring your personal data quickly and easily. Find everything explained below.
Create a data backup

If you're about to migrate from a Windows 10 computer to a Mac, it's important that your personal data moves with you. Although, as you will soon discover, there is a tool designed specifically for transferring personal files and user accounts, it is always good to make a backup copy of important information, copy it to a safe place (better if an external drive, if you dealing with large amounts of data) and transfer it, at the appropriate time, to the new computer.
In this specific case, I do not recommend using automatic software specifically dedicated to backup: since the information must be transferred between two different operating systems, it would be optimal manually copy files and folders from your old computer to an external drive, formatted appropriately, then paste everything on the new computer.
So, first of all, locate the files of your interest on the hard disk of your Windows PC and group the files to be saved in a single folder. For convenience, once the move is complete, take note of the "weight" of the folder: the backup media must have a capacity equal to or greater than the same.
To know the overall size of the save folder, right-click on its icon, choose the item Property from the context menu and click on the tab General of the window that opens: the information you are looking for is found in correspondence with the item Size on disk.
Now, if you don't have a sufficiently large disk or USB stick at hand, you can take a look at my guide dedicated to the best external hard drives and USB drives: there you will certainly find something for you.
Another aspect to take into account is the file system of the backup storage device: in addition to the proprietary APFS format, macOS is able to natively read disks formatted in HFS +, exFAT, FAT32 ed NTFS (the latter, however, read-only, unless you install special drivers). Therefore, I recommend that you format the disk in exFAT, file system natively supported by both operating systems (both reading and writing) and without important limitations, such as the maximum weight of 4GB per single file which instead exists in the old FAT32 file system (also supported by both Windows and macOS ).
I remind you that formatting involves the complete loss of data already on the device. For more information on how to transfer files to an external hard drive, take a look at the in-depth guide that I have dedicated to the topic, equally valid for USB sticks.
Create an Apple ID

Another operation that I advise you to perform is that of create an Apple ID (with an iCloud account attached) to be associated with your user profile: in this way, exactly as it happens for Microsoft Windows 10 accounts, you will be able to synchronize some data (including passwords, browser favorites, history and so on) between all the paired devices to the same Apple ID, as well as download programs, games and applications of various types from App Store.
In addition, the association of an Apple ID to the Mac simplifies the recovery of any forgotten passwords and allows you to quickly locate and lock the Mac if it is lost or stolen.
A profile of this type can be created completely free of charge both during the configuration of the Mac, and through the dedicated website, and requires the insertion of some personal data and your phone number, for security purposes. To learn more about how to create an Apple account, I refer you to reading the specific tutorial I have dedicated to the topic.
Understand the installation of applications
One of the most frequent "traumas" for those who switch from Windows to Mac is to approach theinstallation of programs (on Mac, more commonly called “applications”) which, in most cases, happens in a different way than what happens with Windows.
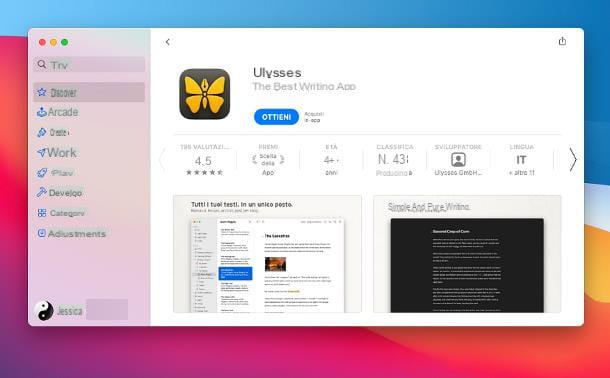
Basically, there are two ways to go: downloading applications directly from App Store, the “market” integrated in macOS (safer method), or download the installation files for the various applications from the Internet. In the first case, after opening the App Store, simply locate the software of your interest, click on its icon and then on the button Get, to download it (you may be required to authenticate with your Apple ID password or Touch ID).
In the second case, however, it is possible to come across at least three different types of files.
- File .dmg: these are real packages that contain the program. After opening such a file, it is usually sufficient to drag the software icon to the folder Applications of the Mac, through the appropriate window, to install it. Sometimes, along with application files, you can also find text files containing instructions and a file dedicated to automatic software uninstallation.
- File .pkg: downloadable individually or contained in their turn in the .dmg files, they can be compared to the installation files in .exe or .msi format of Windows. After starting them, they propose a guided installation procedure which, in most cases, is reduced to pressing the button several times Continue and to insert the Password of the Mac, to authorize the setup.
- File .app: are the executable files of the applications. Generally, they are contained in .dmg packages or .zip archives, but in some cases they may be available individually; although some files can be opened from any location on the Mac, as they contain everything you need to run the software, it is always recommended to copy them first to the folder Applications.
Some programs, during installation, may ask for the acquisition of special permissions or authorizations by the operating system; when this happens, a named button is shown Open System preferences, together with the instructions for unlocking the necessary permissions. To uninstall a program from your Mac, in most cases, simply locate the respective icon in the folder Applications computer and move it to the trash.
To learn more about installing and uninstalling programs on Mac, I recommend that you read the tutorials I have dedicated to both topics.
Use cross-platform software

The macOS operating system can be used "as is", since its first installation: it, in fact, includes a Web browser (Safari), a series of integrated document editors (such as TextEdit e Pages), an audio player (MusicEx iTunes) paired with the streaming service Apple Music, a photo and PDF viewer and editor (Preview), a video player (QuickTime Player) and much more.
However, this does not mean that you are forced to abandon the software you usually use on Windows: many of them, in fact, are also available for the Mac. Providing you with a complete list would be an impossible task (the list would be too long), however let me point you to some of the most famous.
- Online browsing: Google Chrome, Edge e Mozilla Firefox. The three browsers I just mentioned can also be installed on Mac and, if associated with the same profile in use on Windows, they can also automatically import the history, data for automatic form completion, saved passwords and many other information. Be careful, though: in the case of Google Chrome, the consumption of RAM and battery could be very high, especially when compared to that of Safari.
- Office: LibreOffice. for document management, you can use the free LibreOffice suite, available for both Windows and macOS. It includes a text editor (Writer), a spreadsheet editor (Calc), an editor for slides and presentations (Impress), a journalistic editor (Draw), a database manager (Base) and an editor for mathematical equations and functions (Math). If, on the other hand, you usually use Microsoft Office and you do not want to part with it, you will be pleased to know that the office suite produced by the big Redmond is also available for Mac, both with a Microsoft 365 license, and with a retail license associated with the various programs that are part of it. More info here.
- Music: Spotify. The application combined with the famous streaming service, as well as for Windows, is also available for macOS and works in an almost similar way. Of course, all account-related settings (favorites, playlists, etc.) are automatically transferred from one computer to another over the Internet, right after you log in.
- Video: VLC. The famous VideoLAN program, particularly known for being compatible with almost all existing video (but also audio) formats, is also available for Apple-branded computers and represents a very valid replacement for QuickTime, much more complete especially in terms of formats of supported files.
Understand keyboard shortcuts
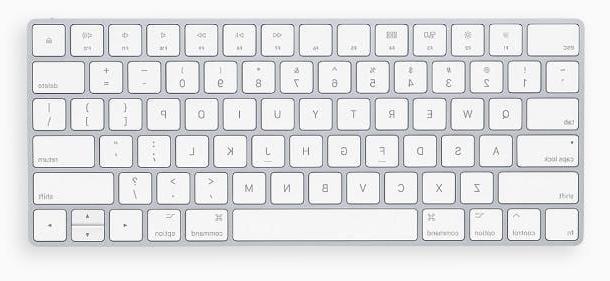
If you love to use Windows 10 keyboard shortcuts to speed up your work, it is good that you know right away that the "special" keys on Mac are slightly different, compared to those usable on the operating system produced by Microsoft.
For example, the key Ctrl Windows gives way to the key cmd ⌘ (o commandthe command) of macOS: therefore, to give you some examples, the keyboard shortcuts to copy (Ctrl + C), paste (Ctrl + V) and print (Ctrl + P), become, respectively, cmd + c, cmd + v e cmd + p.
The key option ⌥ (o option or alt) of the Mac is used both to recall some special characters from the keyboard, and to perform a series of quick operations, together with pressing the key cmd; this latter task is also designated to the key control ⌃ (o ctrl). The special keys uppercase (shift), CAPS LOCK ed fn they mostly perform the same function as their respective Windows counterparts.
To get an idea of the keyboard shortcuts that can be used on macOS, you can take a look at the dedicated page of the official Apple guide.
Final step: use the Migration Assistant
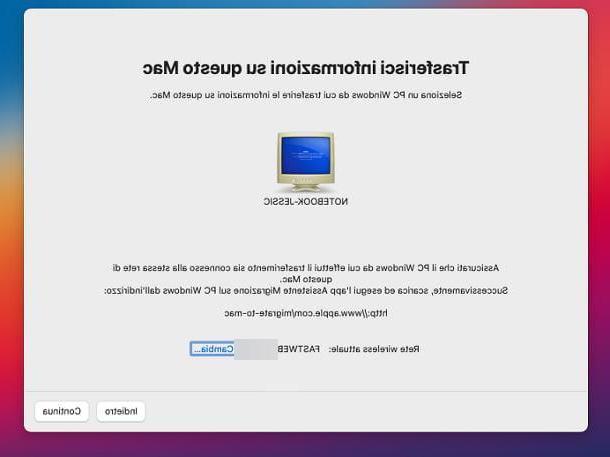
At this point, you finally feel ready to switch from Windows to Mac, but the idea of creating a new user profile, with attached personal files, does not excite you? In this case, you can take advantage of Migration Assistant, the official tool made available by Apple for migrating data from Windows to Mac, from Mac to Mac or from Mac to Windows.
Before proceeding, make sure your Windows PC and Mac are connected to the same Wi-Fi network and that OneDrive, if active, it has been disconnected and uninstalled from Windows 10 (in order to avoid copying the files in the cloud folder).
Done this, on the computer Windows 10, download the Windows Migration Assistant best suited to the Mac edition you intend to migrate to: macOS Big Sur or macOS Catalina / Mojave.
Once you have obtained the file, open it and follow the instructions given to you to proceed with the installation of the software: then click on the button NEXT, accepts the terms of the license agreement by checking the appropriate box and pressing the buttons Install, Yes, end e Yes, to finish the setup and start the Migration Assistant. Finally, click the button Continue twice in a row and, when you see the message appear I am waiting for the connection to the Mac ..., passa al Mac.

If this is the first time you turn on this computer, follow the initial steps dedicated to automatic configuration (choice of language, country and connection to the Wi-Fi network), until a panel dedicated to migration appears; if, on the other hand, you have already configured the Mac, click on the menu Applications> Utilities Finder (located at the top) and double-click on the icon Migration Assistant, which appears in the opened window. When prompted, click the button Continue and inserted the Mac password, to log out of your account and enter Migration mode.
From now on, the steps are the same: put the check mark next to the item From a Windows PCclick on your button Continue and wait a few moments for the Windows computer to be recognized; now, click on its icon, then on the button Continue and verify that the codes appearing on the screens of both computers match.
Pray click on your button Continue appeared on Windows, go back to Mac and put the check mark next to name account (s) to be transferred and their respective data folders (Music, Images, Movies, desktop and so on). If you wish, you can also copy the contents of all the other folders on the disks connected to the Windows PC, simply by placing the check mark next to their names.
Once you have selected the information to transfer, click on the button Continue and, if required, set a password for each Windows account to be imported, by pressing the appropriate button; to finish, enter the Password of your Mac user account, if prompted, and click the button Continue, to start the data transfer. Depending on their size, the process could take several hours.
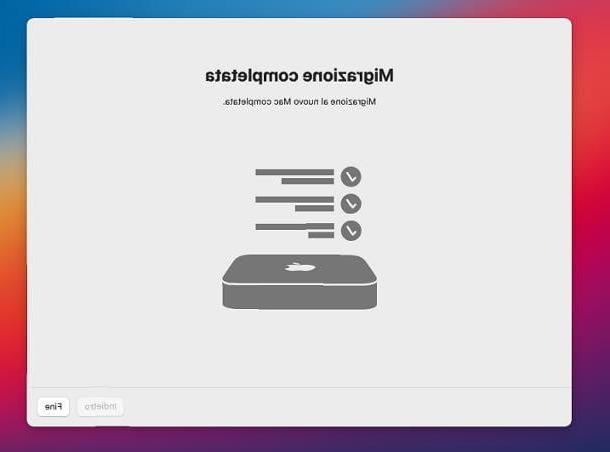
When the migration is complete, your computer will automatically restart and show you a warning message about the migration completed. At the next login, you will be able to choose to use any accounts imported from Windows (which you will need to configure for use on a Mac, following the instructions provided on the screen) and all the data selected previously will be available on the computer disk.
How to switch from Windows to Mac with Boot Camp
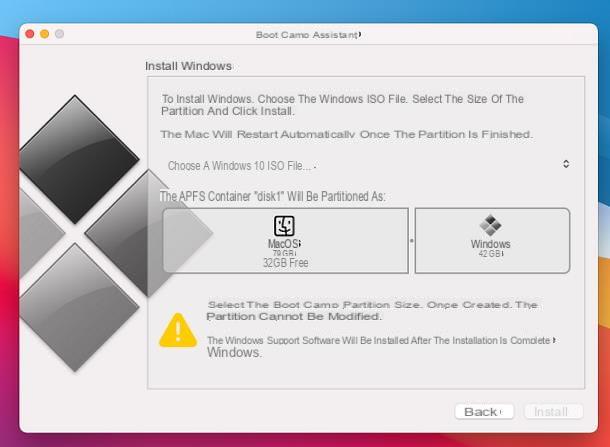
How do you say? Have you started using your Mac but still can't do without Windows? In this case, theBoot Camp Assistant: if you had never heard of it, it is an application included “standard” in all the most recent versions of macOS equipped with an Intel chip, able to guide the user in the installation of Windows on Mac.
This utility it is not available on Macs equipped with Apple Silicon chips (e.g. M1 chip): To check the chip in use on the Mac, open the menu Apple> About This Mac and take a look at the wording corresponding to the item chip.
In detail, Boot Camp creates the partition in charge of hosting Windows, installs it and, finally, automatically downloads the drivers necessary for its operation. Once all the steps have been completed, it is possible switch from Windows to Mac and vice versa in seconds, simply by pressing and holding the button alt or option when the Mac starts up.
For everything to go smoothly, your Mac needs to be connected to Internet and that the related disk has at least 30 GB of free space (depending on the version of Windows to be installed); moreover, you have to download the Windows ISO image yourself and get a product key, with which to subsequently activate the Microsoft operating system. In this regard, I suggest you take a look at the Mr. Key Shop site, which allows you to buy significantly compared to the official Microsoft prices, as it resells unused licenses by companies. The delivery of the product keys takes place via e-mail in a short time, all while respecting the environment and in full compliance with European regulations.
If you are interested in taking this path, I invite you to refer to my guide on how to install Windows on Mac, in which I have explained to you, in detail, all the steps to be taken to succeed in the enterprise.
How to switch from Windows to Mac