How to screenshot on Windows 10 PC
As I told you at the beginning, if you want fare screenshot of Windows 10 you can take advantage of the predefined functions useful for this purpose, usable by means of special "standard" tools or by using dedicated keyboard shortcuts. For more explanations on this, read on.
Capture and Annotate Tool
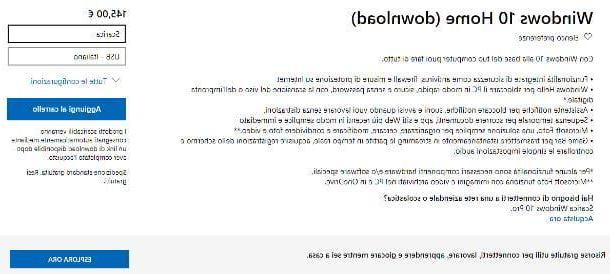
To begin with, let's find out how to take screenshots on Windows 10 using the tool Capture and annotate, which is integrated directly into the operating system (if removed, it can be downloaded again and for free from the relevant section of the Microsoft Store) and was specifically designed to perform the operation in question.
To be able to use it, first start the tool by clicking on Start button (I cheer with the windows flag) present at the bottom left of the taskbartyping "Capture and annotate" in the search field and selecting the first one suggestion relevant in the menu that opens.
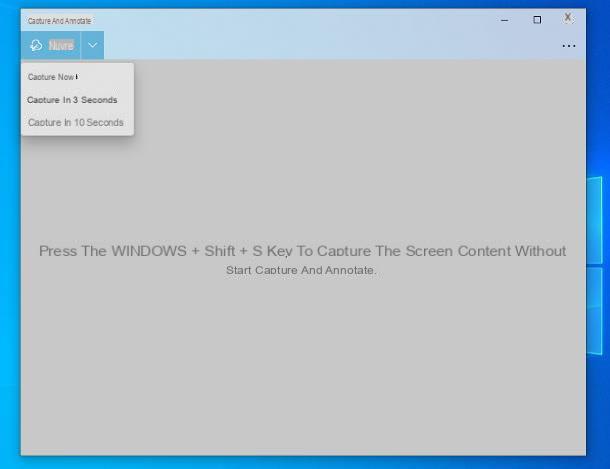
Now that you see the main screen of the tool on your desktop, to start the screen capture, click on the button New located at the top left. If you wish, you can also set a 3 or 10 second timer between selecting the area to be captured and actually taking the photo, by clicking on the down arrow situata accanto to the pulsating New and choosing the option you prefer from the menu that opens.
Next, draw the rectangle for capturing the screenshot by clicking at the starting point and, continuing to hold, moving the newly appeared crosshair to the point of interest.
If you deem it necessary, you can select a capture mode other than the rectangular one, simply by clicking on the buttons on the toolbar shown above: the one with the curved design allows you to make a screenshot by drawing a custom shape, the one with i two overlapping rectangles allows you to acquire a specific window above, while the one depicting a rectangle with the corners in evidence allows you to immediately take a screenshot of the entire desktop. To reset the default capture function, just click on the button with the rectangle that you always find on the toolbar.
When the acquisition is complete, the program editor will automatically open, through which you can view the acquired image. If you deem it necessary, you can also crop the screenshot and / or modify it by adding annotations, strokes and highlights, using the appropriate buttons at the top.
Once the changes are complete or in any case to save the resulting image, click on the button with the floppy disk at the top right and indicate the position, name and format you prefer. You can also copy the screenshot to the Windows 10 clipboard, in order to paste it where you see fit, by clicking on the button with the two sheets which is always at the top of the Capture and Annotate window.
Xbox Game Bar
Another tool you can use to take screenshots on Windows 10, especially if you are an avid gamer and are looking for a way to take screenshots during your gaming sessions, is the Xbox Game Bar. This is a "standard" utility designed to record video game sessions and make screenshots of the same, but which can be used to capture any other activity that takes place on the screen if necessary.
That said, to use the Xbox Game Bar you must first make sure that it is enabled on Windows 10. To do this, click on the Start button you find on the taskbar, click on the icon Settings (Quella with the ruota d'ingranaggio) present in the menu that opens and then click on the wording Toys in the pop-up window on the desktop. Then select the item Xbox Game Bar in the menu on the left and verify that the switch in the upper right is set to On (otherwise you provide).
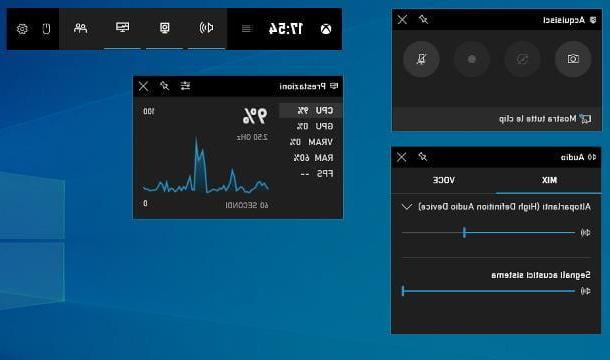
Once you've done the above steps, you can finally take action and bring up the Xbox Game Bar by clicking the Start button on taskbartyping “xbox game bar” in the displayed search field and selecting the suggestion relevant from the menu. Afterwards, you will see the various components of the utility appear on the desktop.
To make a screenshot, then, click on the button with the camera present in the card Acquire (if it's not visible, click the button to fix it camera found on the toolbar at the top center of the screen). The screenshots obtained will then be automatically saved as a PNG file in the folder VideoAcquisizioni of the PC.
Take Edge Web Screen

Do you need to take a screenshot of a web page in its entirety or a portion of a website? If so, you can consider using the feature Take Web Screenshot included in Edge, the default browser of Windows 10.
Once the Edge window is displayed on the desktop, go to the web page of your interest, click on the button (...) at the top right and select the option Take Web Screenshot give the menu to compare.
At this point, if you want to take a snapshot of an exact portion of the web page, make sure that the option is selected on the toolbar that appears at the top. Free selection (otherwise you can, by clicking on the relevant item), then draw the rectangle for capturing the screenshot, clicking at the starting point and, continuing to hold down, moving the viewfinder that appeared on the screen to the point of your interest.
Subsequently, use the menu that is shown to you and decide whether to copy the screenshot to the clipboard, by clicking on the item Copy, or whether to add any annotations to it, by clicking on the item Add notes. Then save the image obtained by clicking on the icon floppy disk.
Instead, if your need is to take a screenshot of an entire web page, after invoking the Edge screenshot tool, select the option Whole page present on the toolbar that appears at the top and wait for the snapshot to be made, then add any annotations and / or save it, proceeding as I have already indicated to you.
Key combinations
If you prefer the use of keyboard shortcuts, I am happy to inform you that you can take a screenshot on Windows 10 even using the appropriate ones key combinations.
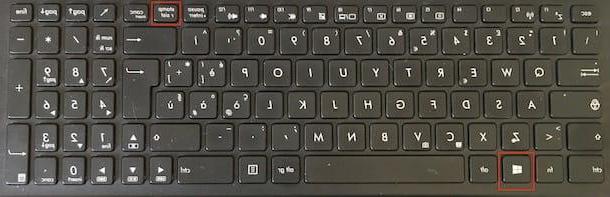
So, if you need to "immortalize" thefull screen, all you have to do is press the keys at the same time Win + Stamp on your computer keyboard. Successful execution of the command should be signaled by a quick blanking of the desktop.
If you don't know, the button Win it's the one with the windows flag which is located at the bottom left. Instead, the key Stamp, which on some keyboards is referred to as Prnt, Prt Scr, Prnt or Print and which in some cases is placed on a multi-function button (so in order to use it you must also press the key Fn), is at the top right.
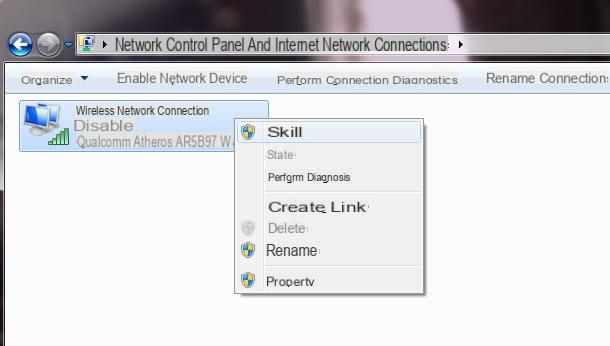
All screenshots made using key combinations are automatically saved in PNG format in the folder PicturesScreenshots of the system. If you prefer, you can still change the destination path of the captured screenshots by right clicking on the folder Screenshots and selecting by voice Property from the menu that is shown to you. Subsequently, bearing in the card Route of the window that opened, click the button Move and indicate the new folder where you want to keep the screenshots.
As an alternative to what I just showed you, you can take a screenshot of the whole screen by pressing just the button Stamp, in order to copy a snapshot of the desktop to the notes Windows, which can then be pasted into any graphics program (eg Paint) by pressing the key combination Ctrl + V.
I also point out that there are key combinations to recall the predefined tools for capturing screenshots that I told you about in the previous lines: using the key combination Win + Shift + S you can quickly launch the Capture and Annotate tool to take the screenshot of a specific window above; using the key combination Win + G you can call up the Xbox Game Bar while using Win+Alt+Stamp you can invoke the function to capture the active window. Finally, using the key combination Ctrl + Shift + S you can invoke Edge's Take Web Screenshot function.
You can also make it so that in conjunction with pressing the key Stampinstead of copying a snapshot of the desktop to the Windows 10 clipboard, the tool is invoked Capture and annotate. To do this, click Start button you find on the taskbarselect the icon delle Settings present in the menu that opens and click on the wording Accessibilità in the window on the desktop, then select the item Keyboard from the menu on the left and move up On the switch under the heading Print Link present on the right.
Programs to take screenshots on Windows 10
In addition to as I indicated in the previous lines, you can capture screenshots on Windows 10 using the help of third party tools. If this interests you, then below you will find those that, in my humble opinion, represent the best in the category. Put them to the test now, I'm sure you won't regret it.
SnapGrab
An excellent program for taking screenshots on Windows 10 is without a doubt Snapcrab, which is free, perfectly compatible with the most recent operating system from Microsoft (as well as with previous versions of the same) and thanks to which it is possible to take snapshots of the entire desktop of the computer, of individual portions of the same or of specific windows; all in a quick and practical way. The images obtained are saved locally, but possibly there is also a function that allows you to share the screenshots online.
To download the program to your PC, visit its website and click the button with the down arrow and the hard drive that you find at the top center.
Once the download is complete, start the .exe file obtained and, in the window that opens on the desktop, click on the button Yes, accept the conditions of use by selecting the item I accept the agreement and proceed by clicking on the buttons Next (three consecutive times), install e Finish, in order to complete the setup.
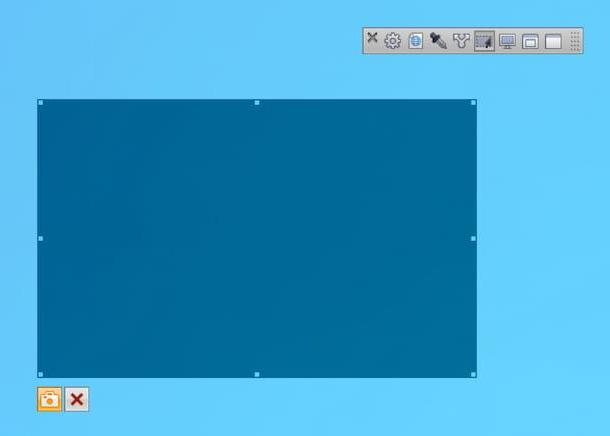
When the program has started, to take a screenshot of a specific area of the screen (to be defined with the mouse cursor), press the button with the selection rectangle present in the SnapCrab toolbar, click anywhere on the desktop, drag the cursor while continuing to hold down the left click and release it once the selection is complete. Finally, decide whether to save the capture, by clicking on the button with the camera, or whether to discard it, by clicking on the button with the "X".
To make other types of screenshots, instead, just click on the other buttons that you always find on the SnapCrab toolbar: the one with the window allows you to "immortalize" the selected window, the one with the two windows to photograph the window in the foreground and the one with the computer to take a screenshot of the entire desktop. In all cases, after clicking on the button relating to the function you are interested in, move the mouse cursor over the element you want to photograph, click on it and wait for the short countdown indicated in the lower left part of the screen to arrive at the end.
By default, all screenshots taken are saved to the desktop in PNG format. Eventually, however, you can change this behavior by clicking on the icon with the wheel d'gear placed on the program toolbar and selecting the item Details from the menu that appears. Next, you will need to select the file format in which to save the snapshots from the drop-down menu Image format and the folder in which to store the latter by placing the check mark next to one of the items placed under the heading Save a capture in.
Don't want to save your captured screenshots to your desktop, but prefer to share them via the web? If so, click the button with the double arrow always attached to the SnapGrab toolbar and select the option you prefer from the menu that is shown to you.
Other programs to take screenshots on Windows 10
The software to take screenshots on Windows 10 that I have already told you about did not convince you in a particular way and then you would like me to suggest you other programs of third parties useful for the purpose? I'll settle you immediately: you can find them in the list below!
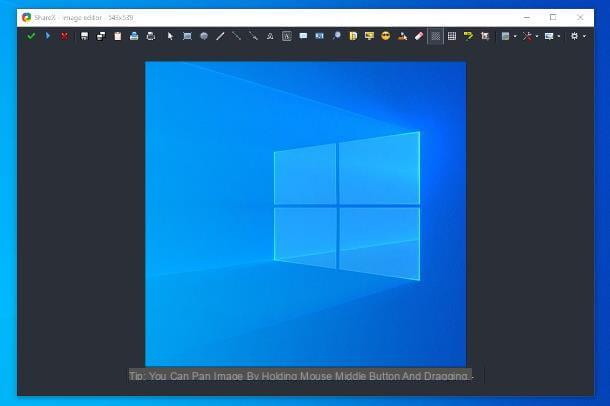
- ShareX - it is a free and open source program, which allows you to create screenshots of various types and possibly also upload them to the cloud. It allows you to completely customize the image acquisition and saving modes and the editor interface.
- Greenshot - excellent software to take screenshots in various ways and which also offers interesting editing functions, thanks to the practical integrated editor. It's free.
- Lighthot - lightweight tool that allows you to freely capture what is visible on the computer screen and to elaborate the resulting images in detail, using the integrated editor. It also allows you to upload captured screenshots online and search the web for similar images.
- FastStone Capture - it is a fairly minimal free software, which comes in the form of a small toolbar to always keep at hand on the desktop and through which it is possible to capture screenshots of the entire desktop, single windows or customized screen portions.