Restrict the programs that start automatically
One of the best ways to optimize Windows 7 is to reduce the number of processes that run automatically at system startup. If you reduce the number of programs that start automatically when you log in to Windows, the system will start faster and you will have fewer programs that “weigh” on RAM and processor.
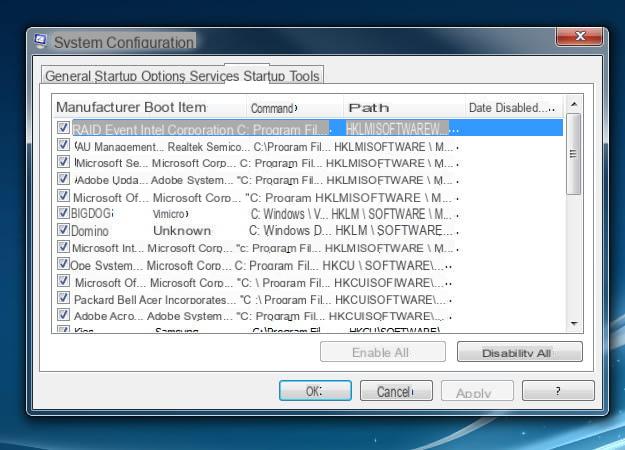
To disable programs set to start automatically you must use thesystem configuration utility which is included with Windows. Then click on the button Home (the Windows flag located in the lower left corner of the screen), type msconfig in the quick search bar and press the button Submit on your PC keyboard.
In the window that opens, go to the tab Start System Configuration Utility and disable unnecessary programs from autorun by unchecking their names. In principle, you can disable all programs except antivirus (eg. avguard, Microsoft Security Client, etc.), operating system components (eg Microsoft Windows operating system) and software that you are sure you want to keep in automatic startup.
To save the changes, click on the buttons Apply e OK and wait for the system to reboot. The next time you start Windows you will immediately notice the difference in speed.
If among the programs set to start automatically you notice any that you no longer use, go to Start> Control Panel and uninstall it completely from your computer. To uninstall a program from your PC, click on the item Uninstall a program located in the control panel, select the name of the software in question from the screen that opens and click on the button Uninstall / Change which is located at the top. In case of problems, find out how to uninstall programs that Windows cannot remove by reading my guide “I can't uninstall a program: here's how to fix“.
Use a lightweight antivirus
Another element that can slow down the PC a lot is the antivirus. If after installing theantivirus you have noticed a strong decrease in system performance, evidently you have installed software that is too heavy or that does not adapt to your hardware configuration.
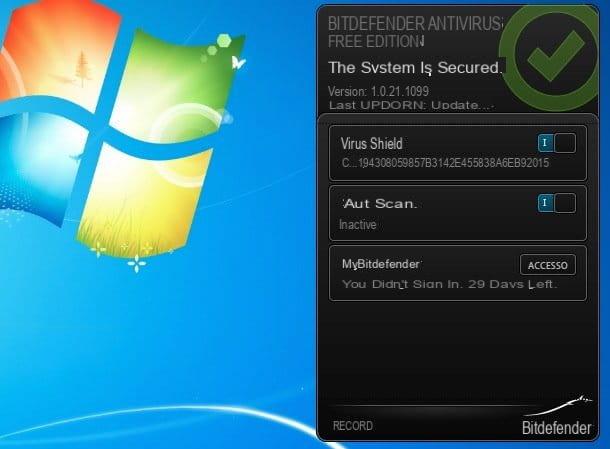
To solve this problem you need to download a lightweight antivirus, that is, it does not use too much RAM and CPU while managing to guarantee a good level of protection. Among the antivirus that are able to guarantee the best ratio between effectiveness and lightness there is Bitdefender Free which is completely free and has always achieved excellent results in comparative tests.
To download Bitdefender Free on your PC, connect to the program's website and first click on the button Download it for free and then on the voice No thanks! I want to download Bitdefender Antivirus Free. Once the download is complete, open the file Antivirus_Free_Edition.exe you just downloaded to your computer and click on the button Yes. Select quindi l 'cityno from the menu for choosing the language located at the top right, put the check mark next to the item I accept the terms of the license agreement and finish the setup by first clicking on Pros. and then starts e Ends.
Once installation is complete, activate your free copy of Bitdefender by clicking on the antivirus icon located in the notification area (next to the Windows clock) and clicking on the button Access present in the box that opens. To create your account on the Bitdefender network you can use your email address (by filling out the form that is proposed to you) or your Facebook and Google accounts.
Now all you have to do is start a good antivirus scan on your PC. On the other hand, we know, viruses and malware are among the main causes of PC slowdown. Then click on the Bitdefender icon using the right mouse button, select the item Full scan from the menu that opens and that's it.
If Bitdefender does not meet your expectations, you can find other free lightweight antivirus in my post dedicated to the topic.
Reduce visual effects
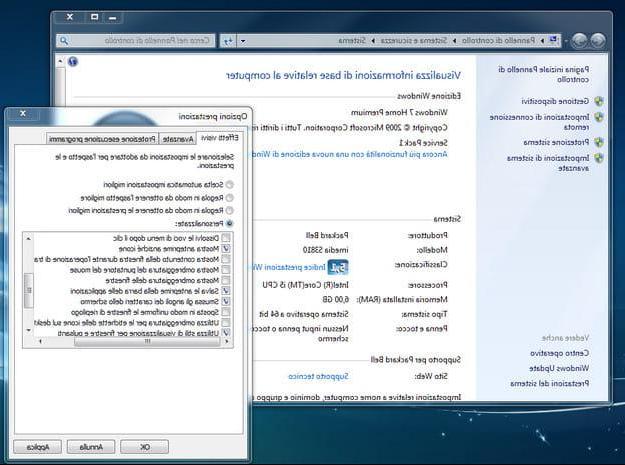
If you don't have a particularly powerful PC, you can also think of optimize Windows 7 disabling some graphic effects (eg transparencies and animations) and some functionality of the operating system that you may not use often but constantly occupy memory space and occupy the processor with their activity. To disable transparencies and animations, click on the button Home Windows, right-click the item computer and click on your voice Property menu that appears.
In the window that opens, click on the item Advanced system settings (in the left sidebar), go to the tab Advanced and click on the button Settings ... Related to Performances. Uncheck all items except Show previews instead of icons, Save thumbnails of the taskbar, Smooth the corners of the screen fonts e Use visual styles for windows and buttons and click on first Apply and then OK to save the settings.
Adjust file indexing
Among the features of the operating system that you could adjust to allow the system to go a little faster, there is definitely theindexing files, the one that allows you to quickly search for files, folders and programs in the Start menu and in the Explorer.
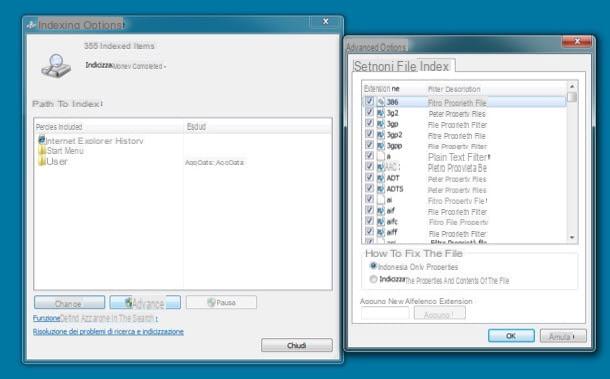
To adjust file indexing in Windows 7, click the button Home, type il finish indexing in the quick search bar and click on the icon Indexing options that appears in the search results.
In the window that opens, click on the button Modification and delete the folders you deem superfluous from the Windows index (the fewer folders are indexed and the less “work” the PC has to do). If, on the other hand, you want to remove the indexing of certain file types, click on the button Advanced, go to the card Types of files of the window that opens and remove the check mark from the file types you want to exclude from indexing.
Do you want to disable indexing completely? Then click on the button Home Windows, type Services in the quick search bar and click on the item Services that appears in the menu. In the window that opens, scroll down the list of Windows services to the bottom, double-click on the item Windows Search, set the option disabled in the drop-down menu Startup typeclick on your button Stop to immediately disable indexing and first click on Apply and then OK to save the settings.
Please note: I advise you to disable indexing only on very old computers and / or in cases of real emergency, this is a very useful function.
Defragment the hard disk
As you well know, over time, the files on your computer hard drive become fragmented and end up slowing down the system which must take longer to open data and programs. Windows 7 includes a feature of automatic defragmentation which defragments the PC hard disk once a week, but every now and then (especially after uninstalling several software or large suite of programs), it is a good idea to perform a manual defragmentation.
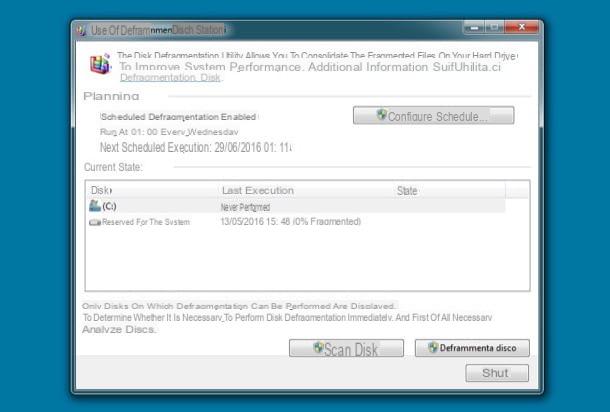
To defragment the hard drive with Windows 7, click on the button Home Windows, type defragmentation in the quick search bar and click on the item Disk defragmentation utility that appears in the menu.
In the window that opens, select the PC hard disk icon and click on the button Defragment disk to start manual defragmentation of the hard disk. You can get more information on disk defragmentation by reading my article on how to defragment PC on Windows 7.
Free up disk space
Contrary to what many think, freeing up hard disk space does not directly affect PC performance. It can help in some special circumstances (e.g. when Windows does not have enough RAM available and uses virtual memory) but generally does not have a positive effect on the speed of Windows.
That said, I advise you to frequently delete the "junk files" that inevitably accumulate on the disk (temporary application files, software residues no longer present on the PC and so on) and to always keep a certain amount of free space on the hard disk to avoid problems during daily use of the PC.
Now, although Windows has a utility for the disk cleaning pretty good, I advise you to opt for an external solution and install CCleaner. Haven't you ever heard of it? Bad. CCleaner is an excellent free program that allows you to delete unnecessary files from your PC, clean the system registry, disable unnecessary programs set when Windows starts and perform other maintenance operations. It is very easy to use and generally does not create problems (even if with software of this type you always have to go there with your feet in the lead!).
To download CCleaner on your PC, connect to the official website of the program and click on the item piriform.com found in the column dedicated to CCleaner Free. When the download is complete, open the file ccsetupxx.exe that you just downloaded to your computer and click on the button Yes present in the window that opens. Then choose thecityno from the drop-down menu for language selection and complete the setup by first clicking on Next and then NEXT, Install e end.
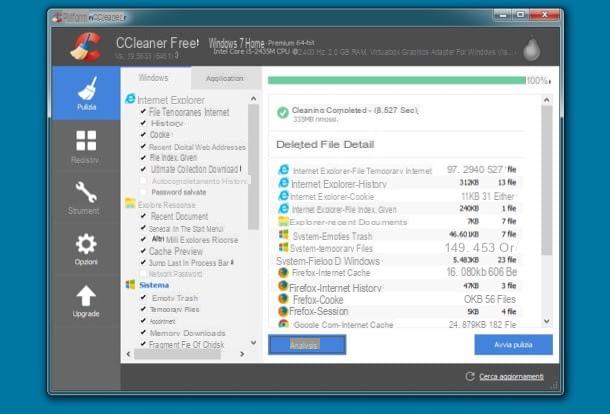
At this point, to delete unnecessary files from the hard disk using CCleaner, start the program and first click on the button Start cleaning and then OK. Through the left sidebar you can also decide which elements to involve in cleaning, but if you do not know where to put your hands it is better if you leave the default settings active.
Please note: CCleaner includes a system monitoring feature that helps keep your computer's performance under control at all times. Personally I do not think it is very effective, moreover it is another process to always keep active in the background, so I recommend you deactivate it. To disable CCleaner monitoring, select the item options from the program sidebar, move to Monitoring and uncheck the items Enable monitoring e Enable system monitoring. Click on OK to confirm the changes.
Other useful tips
Your computer should now be considerably faster than before. However, there are still other things you can do to improve Windows 7 performance.
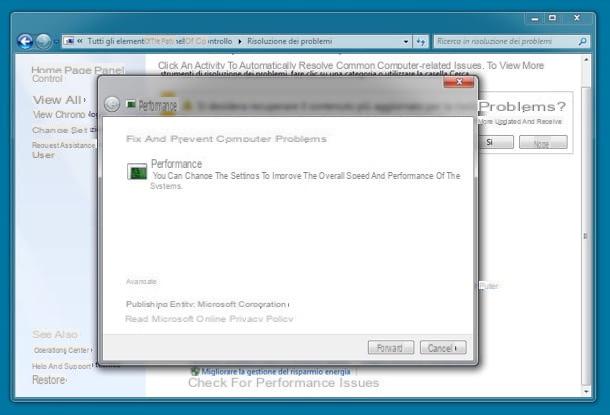
- Use the diagnostic tools - maybe not everyone knows, but Windows 7 includes diagnostic tools that allow you to find out if there are problems related to PC performance. To use the diagnostic tools, go to Control Panel> System and Security> Action Centerclicca sull'icona Troubleshooting (at the bottom of the screen) and choose to Check for performance issues. Another tool that might come in handy is the one that monitors system performance for 60 seconds and reports any problems. To start it, search system performance in the Start menu and click on the first search result, select the item Advanced tools from the left sidebar and click on the icon Generates a system health report.
- Use "light" programs - if your computer feels the weight of age, don't burden it unnecessarily with software that requires a lot of hardware resources. If you don't have any special needs, you can replace the very heavy Photoshop with GIMP or Paint .Net, Adobe Reader with Sumatra, and the list could go on and on. In short, try to use software suited to your needs and the potential of your PC, do not "overdo it".
- Run a malware scan - in addition to virus scanning, it also tries to perform a malware check of the PC on a regular basis. In this way you will be able to identify some cyber threats that traditional antivirus can "escape" and often slow down the system. Find a list of the best free anti-malware here on the blog.