Preliminary information

As I told you at the beginning of the guide, to be able to install Windows 7 on Mac you can choose between two different systems, based on your real needs and preferences. You can install Microsoft's home OS on one dedicated partition of your Mac using Boot Camp, or you can virtualize it creating a virtual machine, in fact, with special programs.
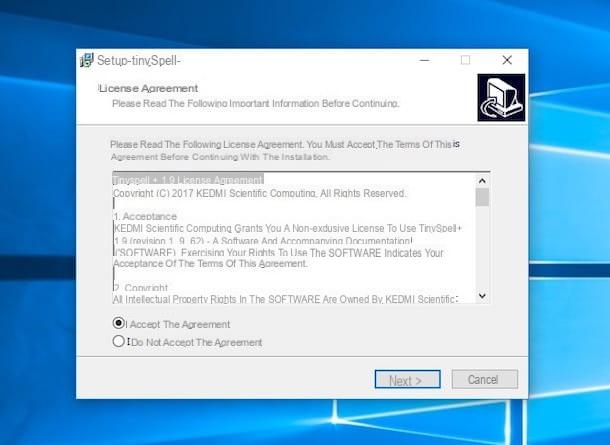
In both cases, you must first worry about finding the installation disc or l 'ISO image Windows 7. To get the ISO image of the operating system you can use Microsoft's Software Recovery website (as I explained to you in my tutorial on how to download Windows 7). Alternatively, you can create it yourself using a computer equipped with an optical drive (as I explained to you in my guide on how to create ISO).
As for installing Windows 7 using Boot Camp, also consider that you need to have one fast enough connection, as macOS will download from the Internet all the drivers and support files necessary for the correct functioning of Windows on the Mac (the amount of data to download amounts to more than 1 GB), and at least 30 GB of hard disk space (40 GB recommended) and 2 GB of RAM.
One high thing you need to get yourself is one USB pendrive for at least 2 GB if you install Windows 7 from floppy disk, or at least 8 GB if instead you install it via ISO file (which is copied right on the stick, together with the drivers).
Only in the case of MacBook Pro (2015 and later), MacBook Air (2015 and later), MacBook (2015 and later), iMac (2015 and later), iMac Pro and Mac Pro (late 2013) the use of the pendrive is not required, as the internal drive is used to temporarily store the items required for the Windows installation.
How to install Windows 7 on Mac with Boot Camp
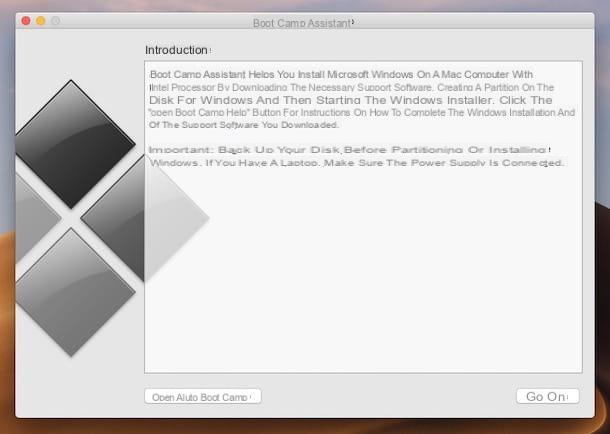
We now come to the real heart of the matter and then let's find out how to install Windows 7 on Mac. Boot Camp. In case you have never heard of it, it is an application included “standard” in all the most recent versions of macOS, which guides you, step by step, in the installation of Windows on Mac: download from the Internet all the drivers necessary for the operation of the operating system of the Redmond company, if necessary it copies the Windows ISO image to a USB key and creates the necessary partition on the hard disk to complete the installation. Using it is really child's play!
To start Boot Camp, all you have to do is click on its icon (Quella with i two hard drives in the stack) present in the folder Other of Launchpad. In the window that you see appear on the desktop, you have to click on the button Continue and you need to make sure there is a check mark next to all the options available in the software, namely: Download the latest Windows support software from Apple (to download drivers for Windows) e Install Windows 7 or Windows 8 (to create the Windows partition and install the operating system on the computer).
Afterwards, press on Continue and, if requested, choose the destination disk, that is the USB key on which to copy the operating system installation files (together with the drivers necessary to make it work). Now, click on the button Continue, wait for the driver download to complete (which may take several minutes, depending on the speed of the connection in use) and Boot Camp will automatically create the key with all the files necessary for Windows to work.
After this step, you will first need to select theISO image Windows 7 and then authorize the execution of a Boot Camp Assistant add-on, called "agent". Type in the Password of your user account on macOS (the one you use to access the system) in the window that opens and click on the button Add assistant.
At this point the disk partitioning procedure will start, which, as widely expected, consists in creating a "separate space" on the Mac hard disk to be allocated to Windows. To do this, select the hard drive to partition (if you have installed a secondary HDD or SSD drive on your computer you can choose that too), put the check mark next to the item Create a second partition for Windows e pigia his Continue.
Therefore, use the indicator found in the partition chart, between one partition and another, to indicate the amount of space to be allocated to Windows (30-40GB) and click on Install e Continue to start dividing the disc.
At the end of the operation, the Mac will restart automatically and the installation of Windows 7 will start. install Windows 7. Remember to select BOOTCAMP as the destination disk of the operating system and format it by clicking on the entry Drive options which is located at the bottom right.
Once the Windows installation is complete, if necessary, insert the driver key created by Boot Camp Assistant into your computer, open the folder BootCamp contained within it and launches the executable setup.exe to install all the drivers necessary for the correct operation of the operating system on the Mac.
To choose, when turning on the computer, which operating system to boot between Windows and macOS, you will have to hold down the key alt on the keyboard of the Mac. Start pressing immediately after the “gong” to turn on the computer.
How to install Windows 7 on Mac with VirtualBox
If you have no particular performance needs (so you don't have to run video games, CAD applications, video editing software, etc.), instead of installing Windows 7 on Mac on a hard drive partition, you could virtualize Microsoft's operating system using a machine virtual. In this way, you will be able to run Windows and its applications without leaving macOS (at the cost, however, of occupying considerable computer resources, primarily RAM). There are various solutions dedicated to virtualization on Mac. In the free area, the best is certainly VirtualBox by Oracle which, among other things, is also open source.
To download the program on your Mac, connected to the program's website, press the button Download VirtualBox xx in the center of the screen and select the link OS X hosts.
When the download is complete, open the package .dmg obtained and, in the window you see appear on the desktop, double-click the icon of VirtuaBox.pkg to start the program setup procedure. In the further window that opens, press the buttons Continue e Install, type the Password of your user account on macOS and click on the button Close.
If you see a warning about thesystem extension blocked, pigia sul pulsating Open Security preferences and, in the window of System preference that opens, press the button Allow bottom right. If you cannot click on the button to allow the use of the extension, first press the icon of padlock placed at the bottom left, type the Password of the Mac administration and press the key Submit on the keyboard.
At this point, fai clic sull 'VirtualBox icon (Quella with il program logo) which was added to the Launchpad to start the software, press the button New in the upper left, indicates the name you want to assign to the virtual machine and select Microsoft Windows in the drop-down menu Type e Windows 7 (64-bit) o Windows 7 (32-bit) give menu to tendin VersionDopodiché by clicking on the button Continue.
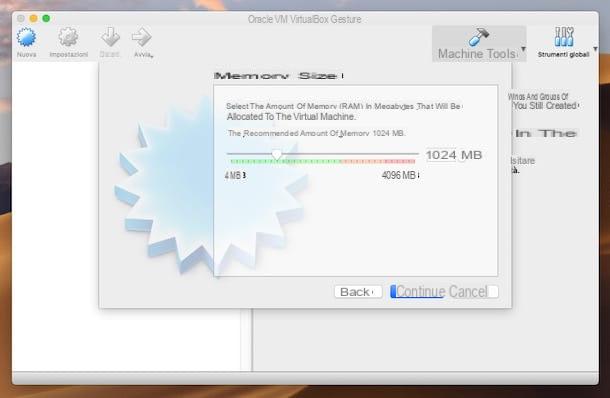
Now, you need to indicate the amount of RAM that you intend to allocate to the virtual machine (if you have no special needs, the default settings are fine) and press the button again Continue. Then adjust the settings related to virtual hard disk (The option is selected by default Create a new virtual hard drive now) and press the button Crea.
Proceed now to indicate the disc file type fixed to use, its filing system, the position of the same and his size always clicking the button Continue and, finally, on the button Crea. Then start the virtual machine by double clicking on its name in the left part of the VirtualBox window, select the diskette di Windows 7 o l 'ISO image of the system through the relative drop-down menu and click on the button Home to kick off the Seven installation procedure.
The installation of Windows will then start, as usually happens when you install the OS on any PC (as I also explained to you in the step dedicated to BootCamp, at the beginning of the guide). Later, you can call up the OS by double clicking on its name in the main software window. To pause the virtual machine or stop it, instead, right-click on its name in the list and use the commands attached to the context menu that appears.
If you think you need more explanations, you can refer to my tutorial dedicated specifically to how to use VirtualBox, through which I have described the operation of the software in great detail.
How to install Windows 7 on Mac with Parallels
Among the paid solutions, always in terms of virtualization, which guarantee better performance and are slightly easier to use, instead, I recommend Parallels. You can choose between the individual purchase at the price of 99,99 euros for life, or the subscription that at the price of 79,99 euros / year allows you to always have the most up-to-date version of the software, but is available in a version of free trial that allows you to test all its functions for a period of 14 days. It integrates seamlessly with macOS and is super easy to use.
To download the software on your Mac, go to the Parallels website, click on the button Download the free trial version e pulsing sul pulsating Download now.
When the download is complete, open the package .dmg obtained and, in the window that opens, double-click on theParallels Desktop icon (Quella with il program logo) to start the setup procedure. Then press on the button Accept, type the Password of your user account and wait for Parallels to be installed on your computer.
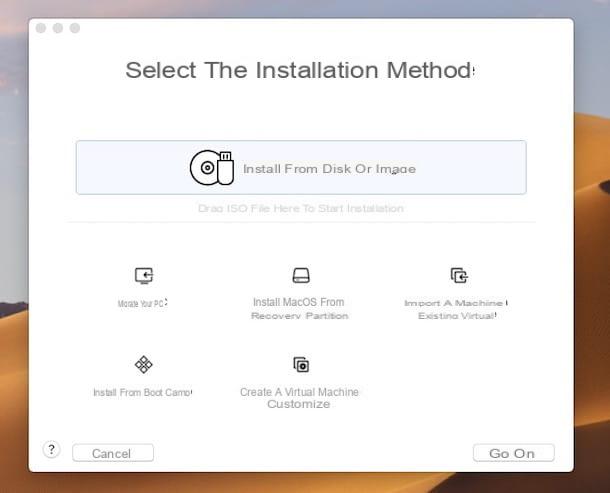
At the end of the process, to proceed with the installation of Windows 7, click on the button Salta and, using the additional window that opens, choose whether to install Seven from a external support (e.g. the operating system DVD) or from a ISO file or if transfer Windows from a PC. Then click on the button NEXT located at the bottom right.
At this point, if you have chosen to install Windows 7 from external media or from an ISO file, press the button Find automatically to allow Parallels Desktop to automatically locate the correct source and press the button NEXT. Next, enter the license key of the system in the dedicated field (if you want to insert it later uncheck the relevant box) and press the button again NEXT.
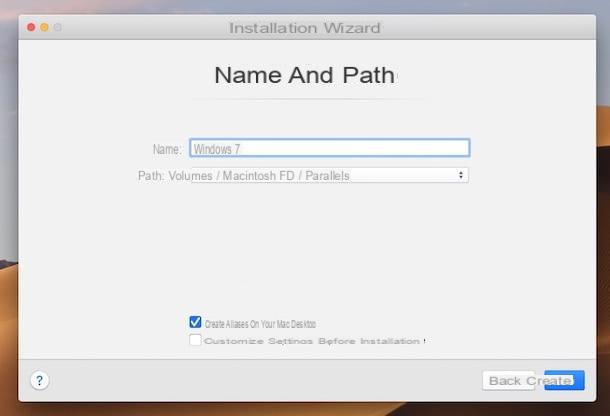
To correctly configure the use of the virtual machine, indicate, then, if you intend to use Windows 7 for operations productive or only for i games and click the button again NEXT. Finally, type the name you want to assign to the virtual machine and specify the relevant one percorso on macOS, choose whether or not to create a collegamento on the desk and click on the button Crea.
If you deem it necessary, you can also adjust all the various ones yourself before proceeding with the installation parameters related to the operation of the virtual machine. To do this, just tick the appropriate option and act on the items and menus in the window that opens.
Subsequently, the installation procedure of Windows 7 will be started. You can then use and manage the OS by recalling it via the appropriate shortcut on the desktop or by selecting its name from the list that is shown to you by right-clicking on the program icon on the Dock bar and on the voice Control Center give the menu check if you press.
How to install Windows 7 on Mac with VMware Fusion
Another solution that you can consider using to install Windows 7 on Mac by going to virtualize the system is VMware Fusion. Even in this case, it is a paid resource (with prices starting from 88,95 euros) which, however, can be tried for free for 30 days. Its configuration is perhaps a little less intuitive than that of the programs suitable for the purpose of which I have already told you but it is worth trying.
To download it, go to the program's website, click on the link Download now at the top right and on the wording Download Now placed under the inscription Try Fusion xx.
Once the download is complete, open the package .dmg ricavato e fai doppio clic sull 'VMware Fusion icon (Quella with il program logo) in the window that appears on the desktop. Then click on the button apri in the further window that opens, type the Password macOS administration, press the button Submit on the keyboard and wait for the program installation procedure to proceed.
If you see a warning that thesystem extension has been blocked, presses the button Open Security preferences and, in the window of System preference that opens, press the button Allow bottom right. If you are unable to press the button, click on the icon first padlock located at the bottom left, type the Password of the Mac administration and press the key Submit on the keyboard.
Next, click on your button Accept in the VMware Fusion window, select the option I want to try VMware Fusion xx for 30 days and click on the button Continue. Then check the item Prova VMware Fusion xx, click on the button again Continue, type the Password of your user account on macOS, press the button Submit on the keyboard, choose whether to send usage statistics related to the use of the software or not and presses the button end.
At this point, you should see a warning that osascript requires checking System Events.app. You click the button OK twice in a row and presses the button Open System Preferences. In the window of System preference that opens, locate theVMware Fusion icon and check the box that you find in its correspondence. If you are unable to do this, click on the del icon first padlock at the bottom left, type the Password of the Mac administration and press the key Submit on the keyboard.
Now, you can take the actual action and go to create the virtual machine with Windows 7. To do this, press the buttons Install from disk or image e Continueselect il diskette or ISO file of Seven and click again Continue. Then adjust the configuration of the virtual machine according to what your needs are and, finally, presses the buttons Continue e end.
When you want, you can recall and manage the Windows 7 virtual machine by right clicking on the VMware Fusion icon on the Dock bar, selecting the item Virtual machine library from the menu that opens, then Seven's virtual machine in the pop-up window on the screen and using the buttons located at the top.
How to install Windows 7 on Mac