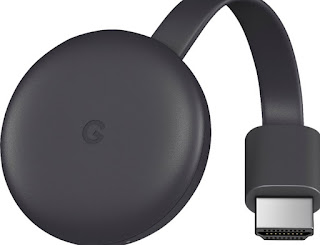
 The Chromecast is certainly one of the most used devices in the living room or on old LCD TVs without a Smart component, since it allows you to view video content and streaming streams taken from the Web and also show content taken from Facebook or other social apps.
Unfortunately, it sometimes happens that the Chromecast does not behave as it should: the video starts sobbing, the playback of the videos is slowed down or worse does not start at all, showing only a black screen or a buffer that loads indefinitely.
If we have run into one of these problems, we are in the right guide: here we will show you all the advice to apply to restore a Chromecast that does not work or is seen in jerks.
After following the tips we will again be able to stream content at the highest quality, without interruptions.
Index Article
- Change the Wi-Fi channel on the router
- Use 5 GHz Wi-Fi
- Use a wireless repeater
- Connect the Chromecast directly to the power outlet
- Reset the Chromecast
- Conclusions
Change the Wi-Fi channel on the router
The first tip to apply if the Chromecast does not work or is seen jerky is to change the transmission channel of the home wireless network.Assuming that you have connected the Chromecast to the 2,4 GHz home network, open any computer connected to the same network, select our favorite browser and type one of the following IP addresses in the address bar: 192.168.1.1, 192.168.0.1, 192.168.1.254 .XNUMX.
A login window will open, where you can enter credentials for the router's control panel.
To learn more about this topic we can read our guide on how to enter the router to access the settings easily.
After entering the control panel, we identify the menu wireless o Wi-Fi, we access the advanced settings (it may be available as a separate menu, at the top) and, in the offered settings, we look for the item Channel o Transmission channel.
Let's change the mode Automatica, by setting one of the channels offered by the router; To avoid interference with nearby wireless networks, we recommend that you set a rarely used channel such as 3, 8, 9 o 10.
Finally, press on Save and restart the router, so as to be able to communicate the channel change to all connected devices.
To learn more about changing channels and how to avoid interference, we refer you to reading our guide on how connect to the wireless channel of the wifi network with the strongest signal.
Use 5 GHz Wi-Fi
If the situation does not improve and we have the latest generation Chromecast, we can connect it to the 5 GHz wireless network, which is faster and less prone to interference than the normal network.
To take advantage of the 5 GHz network we will need to have a modern router, which offers this possibility; to check, simply go back to the control panel (as seen in the previous chapter) and check in the section wireless o Wi-Fi, if there is a menu called 5 GHz o Rete Wi-Fi a 5 GHz.
If we find this menu, let's make sure that the wireless network is active and that it has a different name than the 2,3 GHz network (it can also be similar, the important thing is to be able to recognize it, perhaps adding a suffix such as 5G).
Once the network is enabled, we will have to make sure that the Chromecast connects to it and ignores the 2,4 GHz network.
To make this change on any smartphone, we open the app Google Home (for Android and iOS), tap on the icon devices to see the cards of all the Google devices available on the network,
Identified the Chromecast icon, tap the card menu at the top right, brought in Menu > Settings > Wi-Fi. The Wi-Fi network, tap Delete and subsequently Delete network.
The Chromecast will forget the network used so far: now all you have to do is repeat the configuration procedure from Google Home, this time indicated the 5 GHz wireless network for the connection.
If we have no 5 GHz network, our modem is too old to take advantage of this feature.
In this case we advise you to focus on a new router, like the ones recommended in our guide on which Wifi Router to buy for the wireless network in the house.
Use a wireless repeater
If the Chromecast is used in a room far away from the modem / router, videos can be seen jerky on virtually any occasion.
In order to bring the modem closer without having to change the position of the devices, we can use a wireless repeater.
These simple devices connect to our main wireless network in a specific point of the house (the ideal is halfway between the modem and the Chromecast) then generate a new wireless network, which will act as a "bridge" for the connection.
In this way we can get high speeds even if the Chromecast is far from the home modem.
To understand how a wireless repeater works and how to configure it, we refer you to reading our guide to best 5 GHz WiFi repeaters, to increase internet coverage.
Connect the Chromecast directly to the power outlet
The Chromecast can be connected to one of the USB sockets on the TV, so as to provide electricity without having to stretch the cable too much and turn off the dongle when we turn off the TV.
In some cases the USB port does not provide enough electricity to properly power the Chromecast, thus leading to malfunctions when we play any streaming content.
To remedy this, connect the Chromecast power supply to the wall socket, using any USB charger for mobile phones or purchasing one dedicated to the purpose, such as the one provided by AmazonBasics.
Using the wall socket, the Chromecast will always receive the right amount of current and we will be able to reproduce anything without electrical problems.
Reset the Chromecast
If all the recommendations have not worked and the videos continue to jerk, perhaps the time has come to start the device reset procedure.
To do this we have two options: if the Chromecast is connected to the TV, we press the button on the side of the device for 10 seconds: when the LED turns white, release the button.
Alternatively, go to the Google Home app, then to Devices, tap on the menu at the top right of the Chromecast icon, tap Menu and then Settings -> Other.
To start recovery mode tap on Factory data reset or Reset and subsequently on Restore.
The procedure will start, which will erase all the settings of the Chromecast, making it return to the factory settings
Conclusions
We have shown you all the effective methods to try if the Chromecast is not working or goes into hiccups (clicks).
Let us remember, however, that the fault is not always of the Chromecast: many times even the Internet sites that provide streaming content could get clogged, effectively blocking playback on all connected devices.
If we want to watch videos and movies using the Chromecast, we invite you to read our guide on how watch streaming videos and movies from your PC with Chromecast on TV.
If, on the other hand, we are passionate about IPTV and want to find out how to use it on Chromecast, we invite you to read the following guide -> IPTV in streaming su Amazon Fire TV e Chromecast.
READ ALSO -> Chromecast guide with 18 tricks and applications to use it to the fullest


