Install the official themes
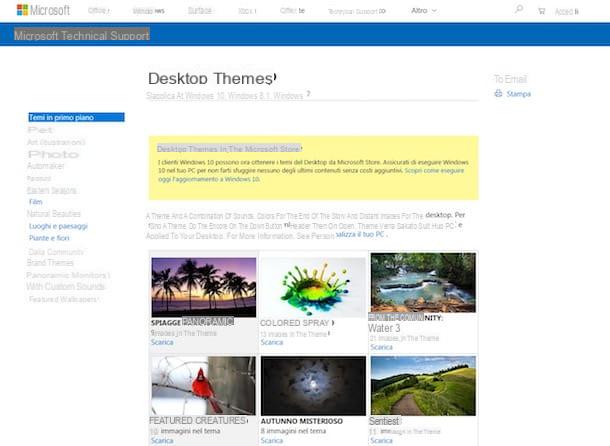
If you want to install new themes on your Windows 7 PC, the first fundamental step you must take is to connect directly from your computer to the dedicated section of the Microsoft website. To do this, you can click on the link I just gave you and use any web browser (eg. Internet Explorer).
As an alternative to the steps above, you can click on the Start button (the one with the Windows flag) which is at the bottom left of the taskbar, press on the item Control panelor found on the right side of the displayed menu, press on the item Change topic che trovi in corrispondenza della sezione Appearance and personalization (if you can't see it, enable the category view using the menu at the top of the window that has opened) and click on the wording More online themes that you find attached to the section Personal themes.
At this point, regardless of the method used to access the gallery of themes, click on the link Download present under the preview of the theme you prefer among the many available in order to immediately download it to your computer.
If at first glance you can't find any themes you like, filter them by category by selecting the one you are interested in from the list on the left. The themes proposed at the first link to the page are those in the foreground, that is to say those of greatest importance at the moment, but by selecting one of the various categories you can only view those relating to animals, art, photography and so on. There are also panoramic themes (for dual screen configurations) and ones with custom sounds. For each theme, the total number of images it includes is indicated.
Once the theme has been downloaded, open the file you just obtained by double clicking on it (nometema.themepack) to access the theme selection screen and automatically set the newly found Windows 7 theme. To confirm the success of the operation, a notification sound will also be emitted. Done! The theme has been applied and now you can finally "enjoy" Windows 7 in a whole new guise. Happy?
Select other installed themes
You have downloaded more than one theme from the special gallery made available by Microsoft and following the instructions I gave you in the previous step you are able to install and apply them from time to time but now you would like to know how to select the one you prefer most beyond the download and installation procedure? No problem, I can also explain this to you.
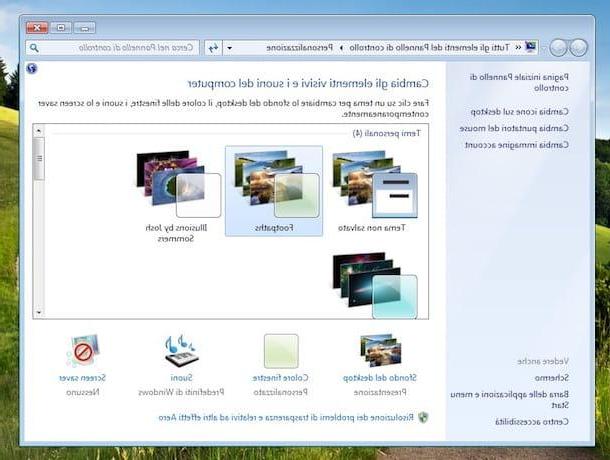
First, access the appropriate section of Windows 7 settings by clicking on Start button (the one with the Windows flag) located at the bottom left of the taskbar, click on the item Control Panel attached to the right side of the menu that has opened and click on the wording Change topic che trovi in corrispondenza della sezione Appearance and personalization (if you can't see it, enable category view using the menu at the top right of the open window on the screen).
If you want to speed up the steps above, you can connect to the section dedicated to customizing Windows 7 by right-clicking on an empty spot on the desktop and selecting the item Customize give the menu to compare.
Now, select the theme you want to use from the various available. The ones you have just downloaded can be found all in correspondence with the section Personal themes in the center of the window. Once you have made your choice, the theme will be immediately applied to the system. To confirm this, a notification sound will also be emitted. Close the open screen window and you're done. Easier than that?
If you are interested in this, I would like to point out that in the window for selecting the themes, together with those just downloaded, there are others already available "standard" on Windows 7. To be precise, those under the heading Aero themes are the default themes with transparent windows, while i Basic and high contrast themes are the default themes without the transparent windows. The theme named Windows 7 is the default one, you can click on it in case you want to restore it.
Change the installed themes
After being able to install new themes on your Windows 7 you can also change some elements of what you have chosen to apply to the system in order to customize Seven even more. Let's see how to do it right away, the steps to take are pretty simple, you have absolutely nothing to worry about.
First, go to the Windows 7 section dedicated to choosing themes as seen together in the previous step. You can then do this by clicking on Start button on the taskbar, by clicking on Control Panel in the menu that opens and then on the Change theme item in the on-screen window or by right-clicking anywhere on the desktop without icons and choosing Customize from the context menu you seem.
Then select the downloaded and installed theme for which you intend to act by clicking on its preview that you find in the section Custom themes then click on the buttons in the lower part of the window.
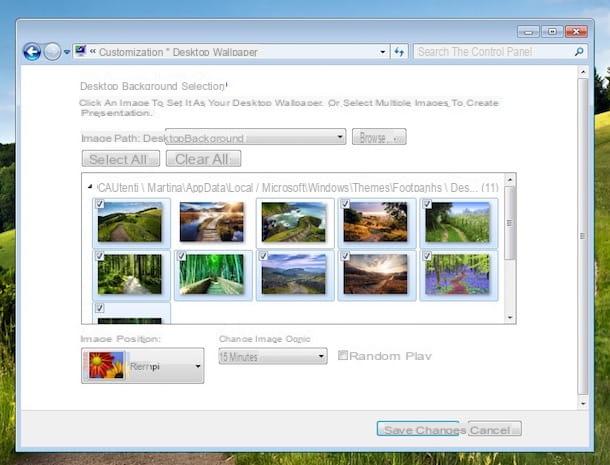
To be more precise, by clicking the button Desktop wallpaper you can choose the images of the theme to use as background, you can add new ones to your liking by clicking on the button Shop by Department in the new screen displayed, you can set the position of the images, you can choose how often to change the image and whether or not to enable random playback. To confirm and apply the changes made, click on the button Save Changes down.
By clicking on the button instead Windows color you can set a different coloring for Windows 7 windows by customizing their characteristics in all respects (title bar, hyperlinks, icons, buttons, selected elements, etc.). To apply and save the changes made, first click on the button Apply e poi quello OK in the on-screen window that opened.
By pressing the button instead Sounds you can choose different system sounds for the chosen theme by selecting the combination you prefer from the drop-down menu Combination: or you can set up completely customized new ones by selecting the reference sound from the section Events: and then clicking on the button Sfoglia .... To apply and confirm the changes, first press the button Apply e poi quello OK in the lower part of the window displayed.
By clicking the button Screen saver you can set a screensaver at will different from the one provided for the theme in use by choosing from the various annexes to the drop-down menu Screen saver in the new window that opened. You can also adjust its settings by pressing the relevant button Settings ... and you can define the waiting time before this activates. Also in this case, to apply and confirm the changes, press the buttons Apply e OK present below.
Install unofficial themes
The themes for Windows 7 made available by Microsoft itself have not been able to satisfy you and would you therefore like to install others from third parties? You can do it. To do this, however, you have to resort to the use of a special and totally free program called UxTheme Patch for Windows 7 in charge of precisely the purpose in question. Now I'll explain immediately how to use it but, I warn you, the procedure to be put into practice is a little more cumbersome than that seen in the previous lines with the official themes. Anyway, nothing particularly complicated or out of your reach, fear not.
First, connect to the program's website and click on the link Download UXTheme Multi-Patcher 15.0 that you find at the bottom, in correspondence with the section Download. When the download is complete, extract the compressed archive obtained in any Windows location and then start the executable file inside it.
In the window that opens, remove the check from the box next to the item Set Windows X's Live as default home page to avoid replacing the browser home page and first click on the button patch and then OK to complete the setup. Then restart the computer for the changes made to take effect.
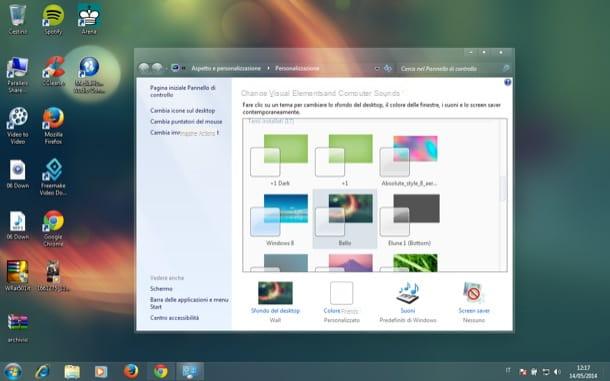
When you log in again to the system you will finally be able to install unofficial themes on Windows 7. To do this, you must first worry about getting the themes to use. You can find them online, on Internet sites dedicated to Windows customization, as in the case of the very famous deviantART which, in fact, integrates a dedicated section.
Once you have found the themes of your interest, extract them from the compressed archive in which they are contained and then try to locate the right files to copy to the Windows themes folder: a file with the .theme extension (eg. temadiprova.theme) and a folder with the name of the theme located in the same path as the .theme file (eg. Test theme).
Once you've found the above files, copy them into your Windows 7 themes folder: C: WindowsResourcesThemes. When the operation is complete, just double-click on the .theme file (eg. temadiprova.theme) and the appearance of your PC running Windows 7 will immediately change.
You will then find all the unofficial themes installed on your PC in the same section of the Windows 7 settings dedicated to system customization where all the other themes are also present, the official ones downloaded from the Microsoft site and those already included in Seven.
How to install themes on Windows 7