Preliminary information
Before getting to the heart of the tutorial and discovering, together, how to partition a hard drive on windows 7, it seems only right to give you some basic information about the partitions that can be found on a disk, their type and the file system they can use. Find everything explained below. I want to clarify that the information concerns both the classic mechanical disks and the most modern SSDs, and also applies to both internal and external disks.
Default partitions
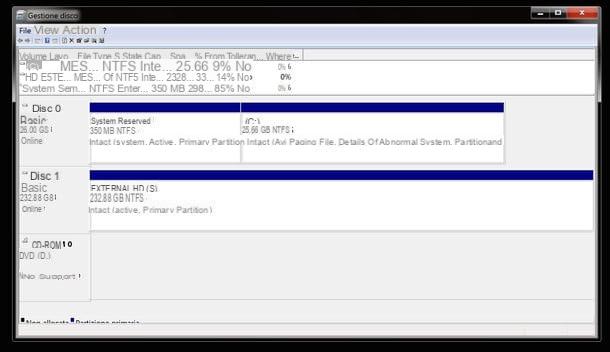
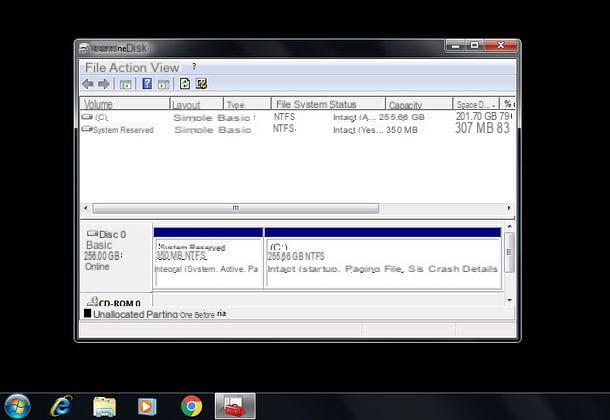
If you've never changed hard drive partitions, the Windows disk utility should look like this.
- Disco 0 - the main disk of the computer on which Windows is installed, divided into two or three partitions.
- System Reserved Partition - about 100 or 350MB. It contains some files used in the starting phase of the operating system and all the elements necessary to take advantage of the BitLocker encryption technology. Do not delete it and do not modify it.
- Partition C: - of several hundred GB. it is the main partition of your hard disk on which there are Windows and data. You can shrink it to create new partitions, extend it (in case you have free space to allocate) but you cannot format it as it is the partition that contains the operating system in use (also by performing an operation like this you would lose all the data contained in it) .
- Other optional partition (eg Recovery) - of 10-15GB. it is present on many computers (especially laptops) and contains the files needed to restore Windows in case of need. Do not delete it and do not modify it.
- Unallocated space - it is hardly present on disks not yet partitioned. However, this is the "free" space available on the hard disk that has not yet been assigned to any partitions.
- Disco 1, Disco 2, Disco 3, etc. - these items will appear in the disk management utility (along with the partition graphics) when you connect other disks (USB hard drives or even internal drives and drives) to the computer.
Logical and primary partitions
If you carefully analyze the graphs with the disk partitions, you will notice that some of them are marked as primary partitions and others like logical partitions. How do they differ? I'll explain it to you right away.
In computers marketed up to 2012 (those based on BIOS and MBR) a maximum of four primary partitions can be created, that is, the disk can be "broken up" into a maximum number of four parts. Logical partitions are "virtual" partitions created within a larger partition (named extended partition) that allow you to bypass the limit of the four primary partitions without compromising the correct operation of the drive.
Both partition types can host operating systems and data, however primary partitions are recommended for operating systems. The primary partition where the boot files needed to boot operating systems reside is marked as active partition.
The above limitations do not exist on new UEFI and GPT based computers, which allow you to create up to 128 primary partitions.
File System
Il file system it is the system that determines how files are organized on disk. The performance of the unit and the maximum "weight" of each file that can be accommodated within it may depend on it. In a Windows environment, disks can be partitioned using three different file systems, each of which has its own characteristics and ideal usage scenarios. Let's try to summarize them briefly.
- FAT32 - it is an almost "universal" file system. Drives formatted with the latter are compatible with all major computer operating systems, tablets, Smart TVs, game consoles and other types of devices. On the other hand, it allows you to host single files up to 4GB in size and involves severe data fragmentation.
- NTFS - this is the Windows default file system. It does not have the 4GB limit, it is subject to less fragmentation than the FAT32 file system but it is not "universal" like the latter. Although many devices are able to read drives that use the NTFS file system, not all are able to write them (thus modify the files they contain or add new ones). Even on the increasingly popular Macs, the NTFS file system is only supported in read mode, special drivers must be installed to enable writing.
- exFAT - it is an evolution of the FAT32 file system that eliminates the 4GB limit and guarantees less data fragmentation. it is supported by fewer devices than the old FAT32 but by more devices than the NTFS file system.
How to partition a disk on Windows 7
Now that you've learned the basics of partitioning and hard drive structure, I'd say it's time to take action and basically see how to partition a drive using the built-in utility in Windows 7.
Create hard disk partition
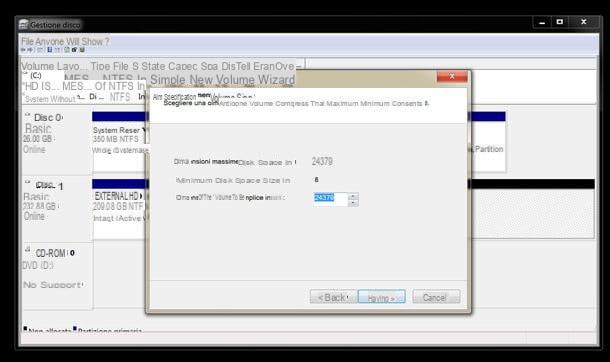
Let's start with creating a new partition. To create a new partition - unless you have the unallocated space available on disk - you need to "shrink" one of the existing partitions on the drive. To do this, right-click on the graphic for the partition to be reduced and select the item Turn down volume give the menu to compare.
Then specify the amount of space to shrink (in MB) in the appropriate text field and presses the button Reduce to apply the changes. It may take a few seconds for the operation to complete.
At this point, to create a new partition, select it unallocated space with the right mouse button and choose the item New simple volumegive the menu to compare.
Nella finestra che si apre, click on your button NEXT and follow the wizard to create the new partition on the hard disk. Then specify the simple volume size (i.e. the amount of space to reserve for the partition), the letter to be assigned to the drive (the letter to be displayed in My Computer) and the file system to use for its formatting, click on NEXT e end and wait for all changes to be applied.
The procedure for resizing and creating new partitions does not result in data loss. In any case, before putting your hand to the disc, it is always good to make a backup copy of the most important files. Caution is never too much!
Delete hard disk partition
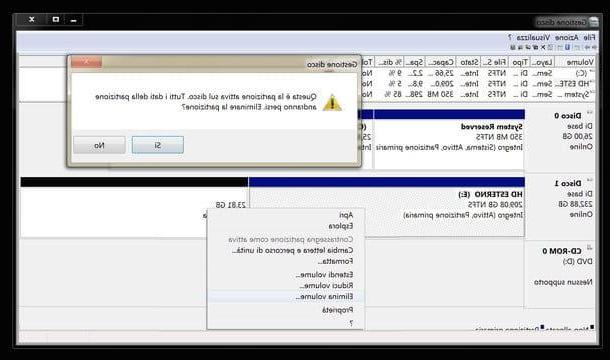
Deleting a disk partition is as easy as it is "drastic". Once the operation has been carried out, in fact, all the data contained in it will be deleted and can no longer be recovered (unless you use software for data recovery, and do it before the information to be recovered is overwritten by other files) .
To delete a partition in Windows 7, just select its graphic with the right mouse button, choose the option Delete volume from the menu that appears and confirm the operation by clicking on Yes.
At the end of the procedure you will get some unallocated space that can be used to create a new partition or extend an existing one.
Extend hard drive partition
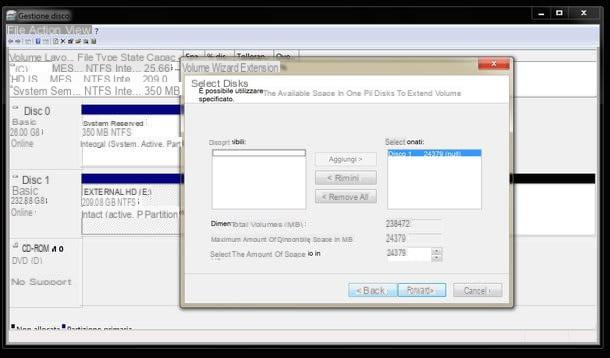
If there is any unallocated space it is possible to extend one of the partitions adjacent to the latter (which therefore in the graphic of the hard disk are located close to the latter).
To extend a partition with the disk management utility included in Windows 7, right-click on the graphic for the latter and select the entry Extend Volumegive the menu to compare.
Nella finestra che si apre, click su NEXT, specify the amount of space (in MB) to add to the partition and complete the procedure by pressing on NEXT e end. The operation does not involve the loss of any data.
Programs to partition hard drives on Windows 7
Doesn't the partitioning utility included "standard" in Windows 7 satisfy you? Trying to partition a disk with the latter, do you get an error message that prevents you from moving forward? If so, you need to consider using others programs to partition hard drives on Windows 7: there are excellent ones even in the free area. Now I'll point out a couple.
MiniTool Partition Wizard Free Edition
MiniTool Partition Wizard Free Edition is a great disk partitioning software. It supports all major disk types (both internal and external, both mechanical and SSD) and file systems and is very easy to use. It is free for personal purposes, otherwise there is a paid version ($ 39) that can be used for commercial purposes and includes additional functions, such as converting dynamic disks and creating self-starting disks.
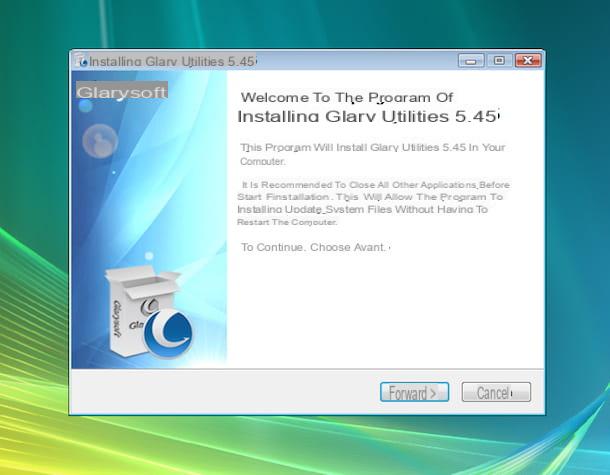
To download MiniTool Partition Wizard Free Edition on your PC, connected to the official website of the program and click on the button Download located in the center of the page. Then open the .exe file obtained and, in the window that opens, click on the buttons Yes e OK.
Then put the check mark next to the item I accept the agreement, go ahead by clicking on Next four consecutive times, deselect the items relating to the installation of additional software (eg. Opera Browser) and finish the setup by pressing on Next, install e Finish.
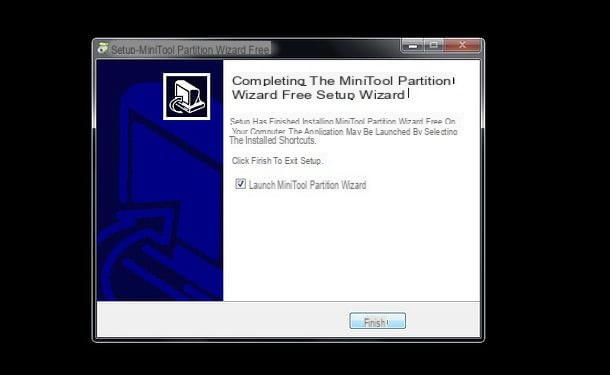
Once the installation is complete, you just have to start MiniTool Partition Wizard Free Edition using its icon on the desktop or in the Windows Start menu and then clicking on the box MiniTool Partition Wizard Free Edition in the window that opens.
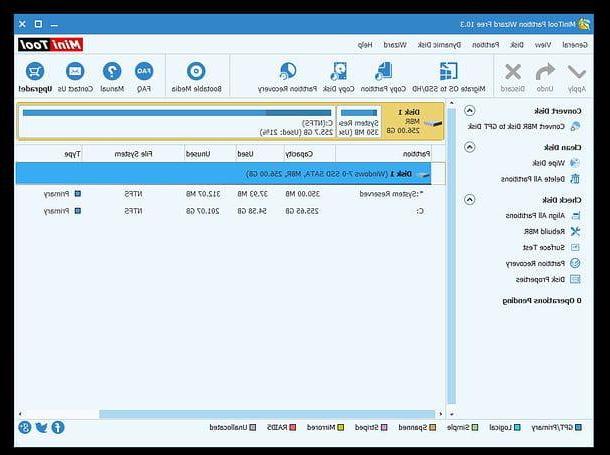
The software interface, even if in English, is very intuitive: at the top there is the toolbar with the action buttons (Apply to apply the scheduled changes, undo to go back, Discard to undo the latest changes and so on), further down is the partition scheme with the list of available disks and partitions, while on the left is the list of actions that can be accomplished.
To partition a disk, therefore, you must select the drive or partition on which to act from the partition scheme and then choose one of the actions listed in the left sidebar. For example, to resize a partition you have to choose the option Move / Resize partition, to extend it Extend partition, to unite it Merge score, to delete it Delete partition, to format it Format partition, to create it Create partition (option available only by selecting a tile of unallocated space) and so on.
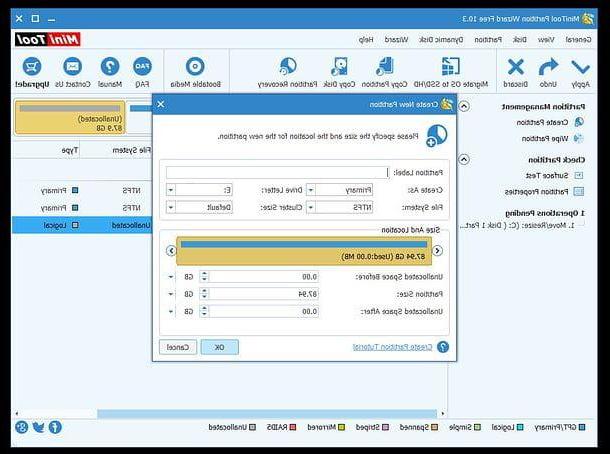
Once you have chosen the action to be performed and adjusted the relative preferences (e.g. by how much to resize a partition), you must click on the button OK, Then Apply (above) and, if necessary, you must accept the restart of the PC. MiniTool Partition Wizard Free Edition will apply all desired changes to the disk before the operating system starts up.
If any step is not clear to you and / or you need more information on how to use MiniTool Partition Wizard Free Edition, I invite you to read my tutorial on how to partition the hard disk, in which I told you in more detail about this software.
GParted
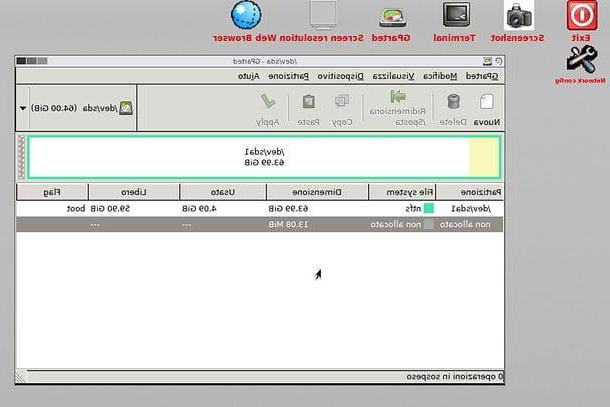
If MiniTool Partition Wizard Free Edition has not convinced you and / or you need to operate in an advanced way on the main disk of your computer (the one that hosts the operating system), you can contact GParted: it is a Linux distro including tools for disk management which, once started from floppy disk or USB key, allows you to act freely on all disks and partitions of your computer. It supports internal drives, external drives, SSDs and is compatible with all popular file systems.
If you want to know more about Gparted and want to learn how to best use it, read my guide on how to extend a partition in which I told you in more detail about this distro.
How to partition Windows 7 hard drive